Among my goals this year was get started in reloading. This is something that I’ve wanted to get into since 2010, and still have the books and manuals I bought way back then. I never really committed to it for a few reasons. First, I didn’t really have a good space to set up and do it. Second, the startup costs for all the tooling needed to get into rifle loading was daunting. Lastly, for pistols, I was almost exclusively shooting 9mm, and not in enough volumes to make reloading worth it.
That changed over the last couple of years, however. My focus shifted more towards pistols and handguns rather than rifle shooting. Pistols are easier to load for, generally, and the components (brass, bullets, primers, and powder) are cheaper to acquire and use.
About midway through 2025, deep in my rabbit hole of the 1911 platform, I decided that I wanted to revisit the reloading question.
Choosing a Starting Cartridge
While deep in the 1911 enthusiast phase, you’d think my first impulse was to start handloading 45 ACP. But it wasn’t. Rather, I had in mind that I wanted to get into the classic 38 Super Auto cartridge. There’s some great history out there concerning the origins of the 38 Super round. The short version, however, is that in the early 1930’s, law enforcement was having problems with their .38 revolvers and 45 ACP 1911s penetrating auto glass and car doors. There was a need for a beefed up .38 caliber bullet with more velocity to get better penetration.
Development went along two lines. For revolvers, the first iteration was the .38-44, effectively an early version of a .38 Special +p+ that still didn’t quite hack it. For pistols, Colt tackled the effort by bringing John Browning’s 38 ACP cartridge into the mix and dramatically increasing the pressure. They chambered 1911 pistols for it. The 38 Super has the same overall length (OAL) as the 45 ACP, which made for reliable feeding with minimal modification required to the manufacturing line.
The 38 Super was a hit, at least for a few years when the competing revolver design evolved into the .357 Magnum. The “Super” slowly faded away outside of enthusiast circles. It saw a resurgence later on particularly with competitive shooters who enjoyed how the higher gas pressure worked with their compensated race guns. It’s still hanging around today, with a dedicated group of enthusiasts singing its praises.
But Alas…
Since I was into the 1911, and the 38 Super has a cool history and nice performance, it seemed like a logical path. However, the thought of chasing my brass all over the range to collect it did not appeal to me. That would only be more difficult due to the fact that I typically shoot at indoor ranges- and the floor is littered with 9mm brass. The prospect of not only trying to chase down my brass, but then pick and sort through all of the 9mm turned me away.
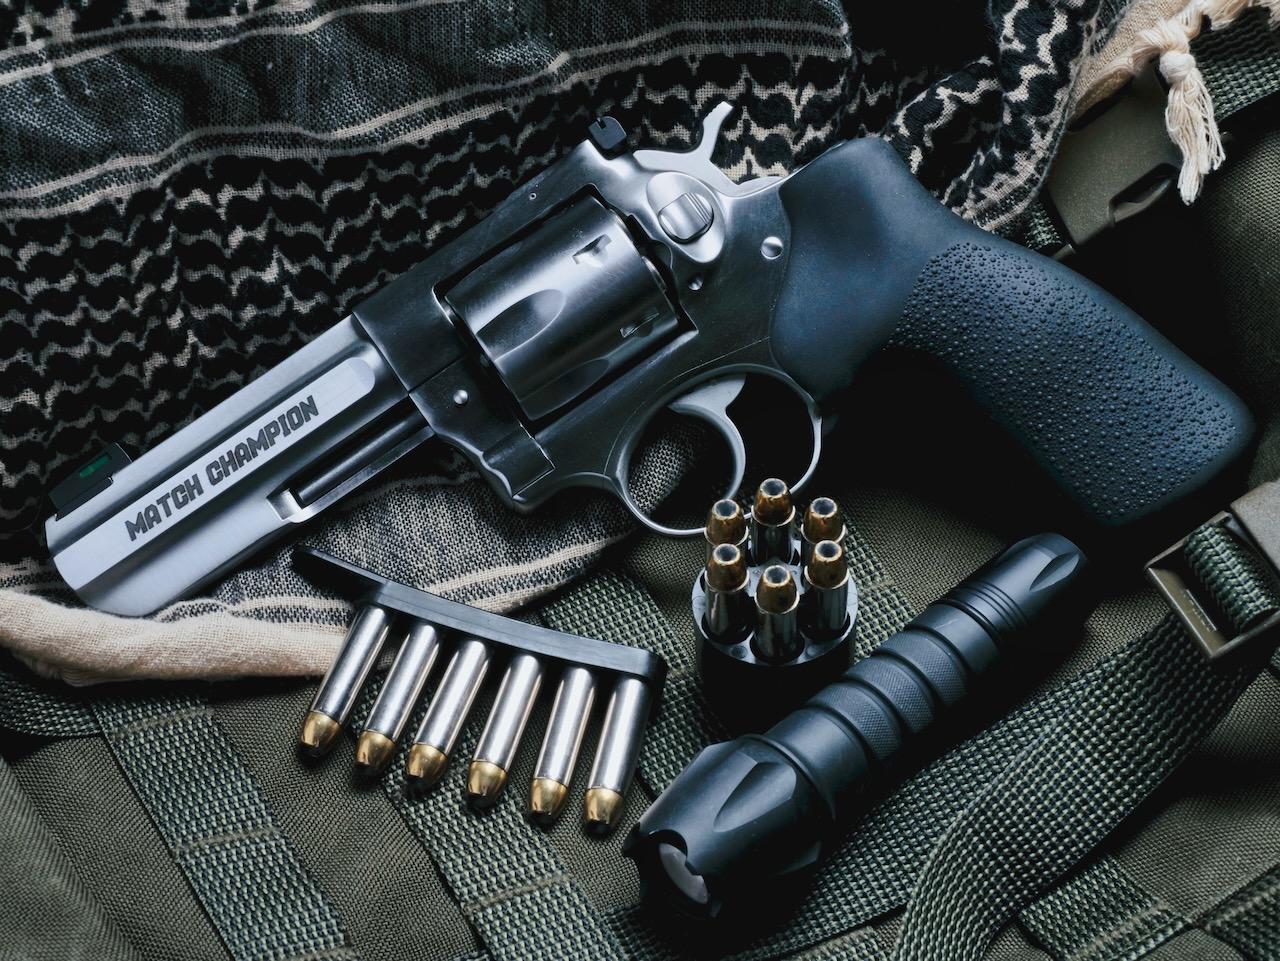
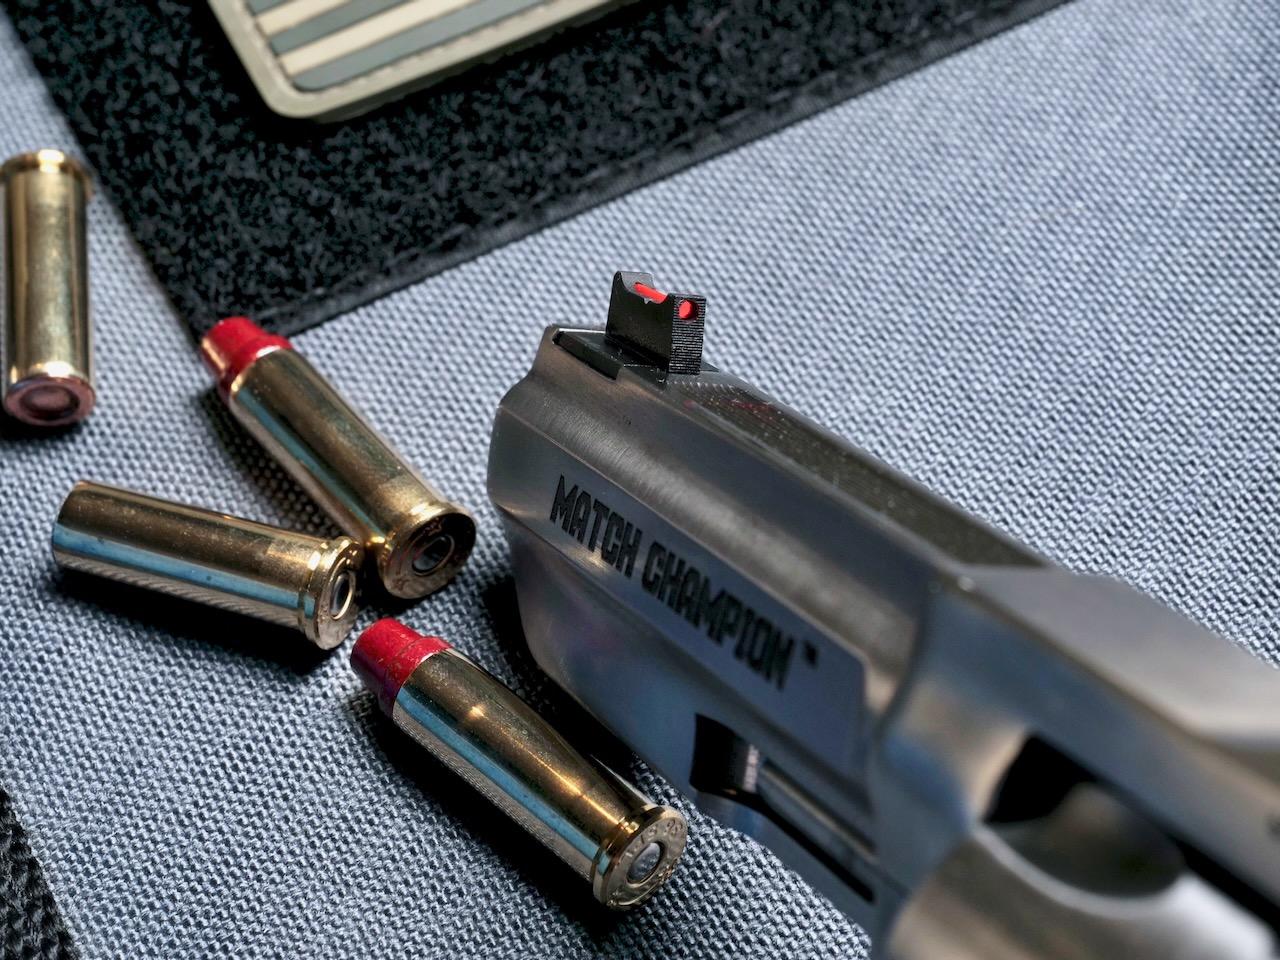
Then I got the chance to test a.357 lever action for American Rifleman (the Henry SPD HUSH). I walked away from that review with an appreciation for the revolver cartridge, and had enough leftover ammo and nothing to shoot it in that i went down a rabbit hole. That eventually led me to buying a Ruger GP100 Match Champion.
The .357 Mag and .38 Special have an incredible amount of load data to support them. As I came to find out, they are often the most suggested cartridges to start with, too. As a bonus, since I’m using them through a revolver, there’s no need to chase brass anywhere. Retaining my spent cases is stupid simple.
With the cartridge selection out of the way, let’s talk about the press.
Choosing a Press & Setup
Nearly all of the advice I read going back to those first books in 2010 was to start with a single stage press and gain comfort with the process. With a single stage, you could do all of the work in batches. Size 50 cases, prime them, charge them, seat the bullet, and crimp. It makes total sense.
I assumed that this was the route I would go, with the only exception being that I might go with a turret press like a Redding T-7 or Lyman All American 8, instead. That way I could set the dies up the way I wanted and quickly work through batch operations, or run it as a progressive-ish press over time.
To be fair, I still think this is probably the best way to learn reloading and get comfortable with the process.
My problem is one of space. I was worried that I would quickly figure out a flow and want to upgrade from a single stage or turret to a progressive, and then I have limited space to work with. So I explored options, read conversations, and decided to take a middle ground: the Dillon 550c.
The Dillon 550c
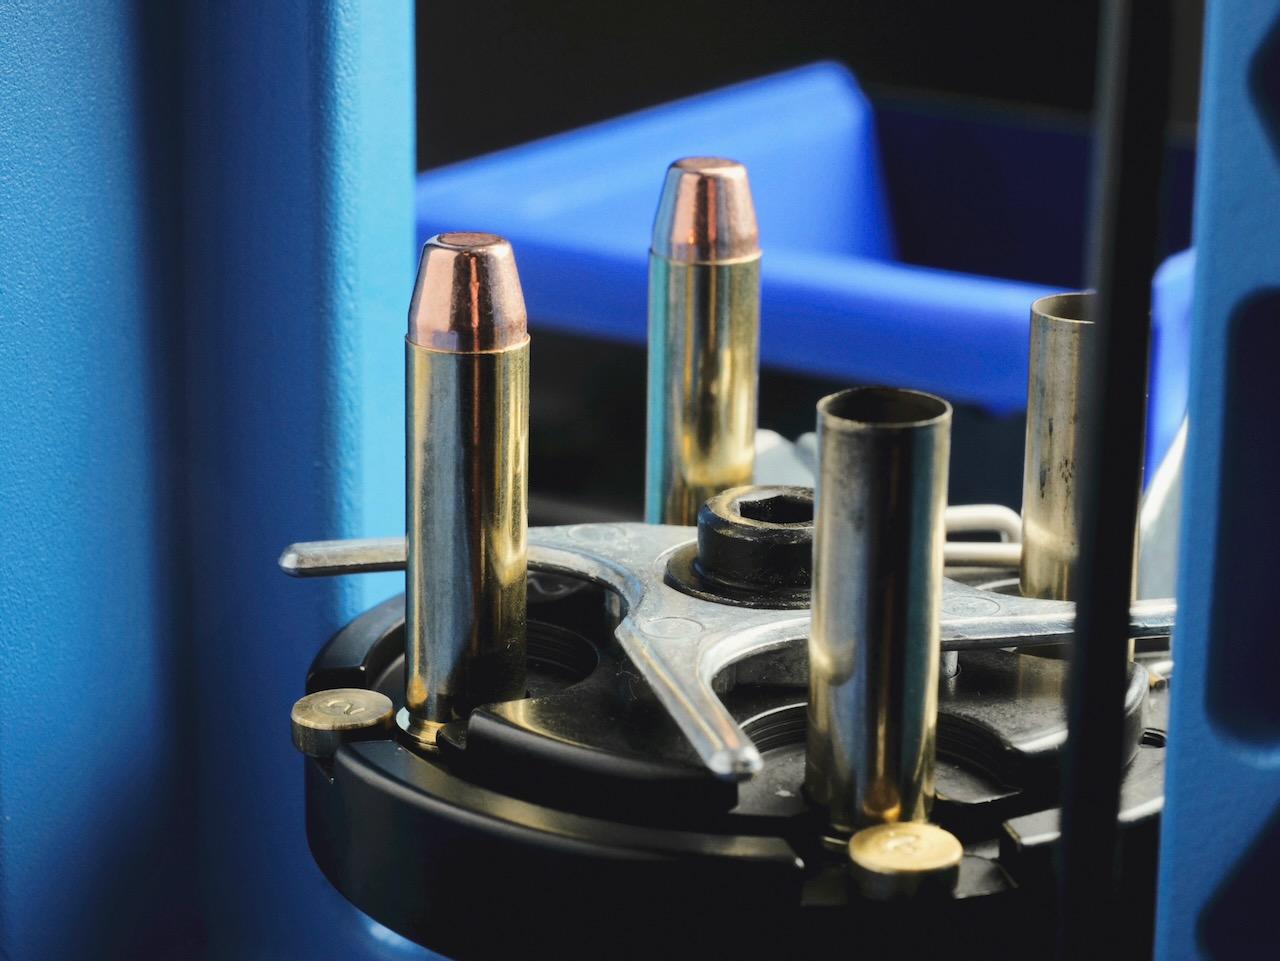
The Dillon 550c is a four-station progressive press, but lacks the automatic indexing of typical progressive models. Instead, after each pull of the lever, manually move the shell plate to the next station with a turnstile-like lever. This advances all four stations at the same time. If you wanted to go slow, you could do one round at a time, checking after each stage to make sure things were working well- similar to a turret press.
It might not have been the best choice for a first press, as many people prefer to start simpler or more on the budget end of things. But I was confident that I could figure it out and then have done in one shot.
Setup for the press along with a 357/38 conversion kit and a set of Dillon dies was pretty straightforward. There are plenty of videos out there in addition to the manual.
Accessories
Aside from the minimum required gear for the press, I also picked up a few things that have been helpful.
First is the mount. I put the Dillon 550c on top of an Inline Fabrications 9.75″ tall Ultramount with the quick detach plate system. I originally thought I was going to bolt the mount directly to an old workbench I have, but it wasn’t going to work because the two front mounting holsters were directly on top of the welded steel frame support beneath the top. The Ultramount let me both raise the press up so I can comfortably work it while standing, but also move it back a few inches to get clearance from the frame.
The quick detach plates, of which Inline Fab makes for mounting many pieces of equipment, will let me swap stuff around in the future. I’ll likely end up with a turret press for brass processing at some point, and being able to drop a priming system or bench vice onto it in the future is a benefit.
On the back of the mount, I also added a swing arm with an additional tray to hold my empty brass.
The quick detach plate for the 550c also comes with a spot for mounting a bullet tray. I opted for Inline Fab’s model, which also has a convenient spot for putting things I might need ready access to.
Beyond the press stuff, I’ve been gathering all of the other things I need for success: a scale (Dillon’s digital model), primer flip tray, case gauge, etc.
Lighting
Something I found out very quickly is that lighting matters a lot. You really need it to see what you’re doing, especially when it comes down to looking into the case to verify the powder charge. The spot I put the press really does not have good lighting, so I installed a very bright overhead LED shop light. I also picked up an inexpensive clamp on gooseneck LED light that I can maneuver around the press. Then there’s a KMS2 UFO light that I put on the inside of the press that just lights up everything.
All together, this has proven to be a good combination for looking at everything going on during the process.
As a bonus, this workbench is also where I do a lot of my cleaning and amateur gunsmith work, and now I’ve got great lighting for seeing what I’m doing.
The First Loads & Lessons Learned
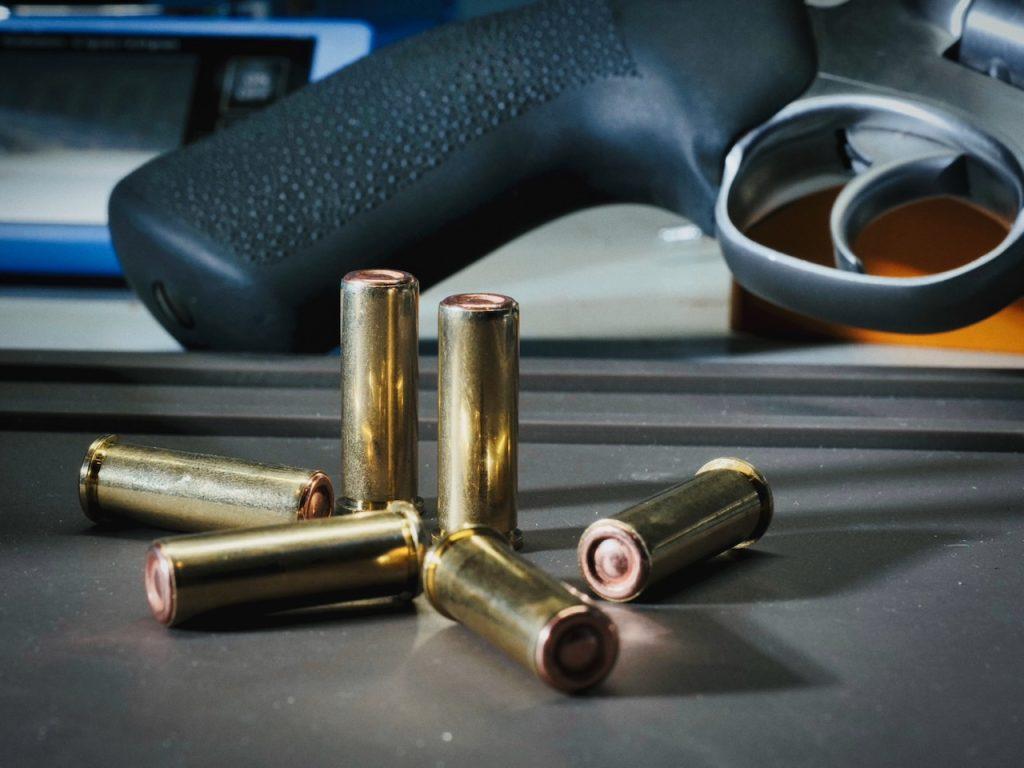
With the press and everything set up, it was time to load. I had a bunch of spent brass from doing the GP100 testing, but I also picked up a few hundred virgin Starline 38 Special brass cases. I swung by my local Cabelas and grabbed a pound of HP-38 powder and a several boxes of CCI 500 small pistol primers.
For bullets, I decided to get an assortment.
- Berry’s bullets 158gr thick plate round nose flat point (TP-RNFP)
- Berry’s bullets 148gr plated double end wadcutter (DEWC)
- ACME Bullets coated 158gr lead semi wadcutter (LSWC)
- Hornady 148gr lead hollow base wadcutter (LHBWC)
You can probably see the theme here for mostly wadcutter style rounds given my focus on target shooting during 2026.
Let’s look at how each of these shook out. Keep in mind that I’ve only loaded up a few charge weights, so there hasn’t been a ton of room to play. That said, I’ve been happy with the results. All velocity testing done with the Garmin Xero C1-Pro.
Berry’s 158gr TP-RNFP
This is a lead bullet with thick copper plating. The advantage to the thick plating is that it withstands higher velocity (up to 1500 FPS, according to Berry’s) and has a crimp groove. Usually, plated bullets have a much lower velocity threshold and no groove, so you have to be careful about the crimp or else you’ll damage the plating. Note: Plating is not the same thing as copper jacketing. Two different processes, with plating being much cheaper.
For this one, I worked up three charge weights and loaded it all in once-fired PMC brass with CCI 500 primers. Everything was loaded to a cartridge overall length (COAL) of 1.45″.
| Charge Weight | Velocity Data | Notes |
|---|---|---|
| 3.8 gr HP-38 | AVG: 650.3 FPS Std Dev: 11.4 Energy: 148.4 Ft-Lb | Very soft shooting, on par with a .22 pistol. Honestly concerned this was so light that was going to get a bullet stuck in the barrel. |
| 4.0 gr HP-38 | AVG: 692.0 Std Dev: 11.9 Energy: 168.0 Ft-Lb | A little more oomph, but not by a lot. Would probably make a great load for introducing a new shooter to revolvers. |
| 4.2 gr HP-38 | AVG: 747.3 FPS Std Dev: 10.8 Energy: 195.9 Ft-Lb | Felt like a good all-purpose load for training and action shooting. Better velocity consistency, too. |
This seemed like a good place to start. Were I to want to build up a batch of all-purpose rounds that shot clean and comfortably, and looked very similar to standard factory ammo, then the 4.2gr of HP-38 seems the way to go.
Berry’s 148gr DEWC
This was my introduction to wadcutters. If you aren’t familiar (and I wasn’t), this bullet is seated deep into the case to the point that the front of the bullet is about flush with the case mouth. It makes for a very strange looking cartridge, all said and done.
The Berry’s 148gr DEWC is a cylindrical lead slug that’s plated in copper. Both ends of the bullet are identical (hence, double-ended). That means you put either side pointing up.
One of the advantages to wadcutters is that the bullet sitting so deep eats up a lot of case volume. This means you get higher pressure, and more consistent pressure, out of smaller powder charge weights. Wadcutters also gained popularity for snub nose revolvers because they tend to penetrate really well even at lower velocities.
I only loaded up one charge weight for this, 4.0gr of HP-38. Berry’s cautions against going too slow with their plated DEWC because the very long bearing surface of the WC combined with high friction of the copper can make bullets get stuck if the velocity is below 800 FPS. I loaded them to a COAL of 1.16″, which put the leading edge of the bullet just in front of the case mouth, and gave it a light roll crimp.
| Charge Weight | Velocity Data | Notes |
|---|---|---|
| 4.0 gr HP-38 | AVG: 862.7 FPS Std Dev: 2.6 Energy: 244.5 Ft-Lb | Very consistent round. Pleasant to shoot with clean holes. No significant fouling. |
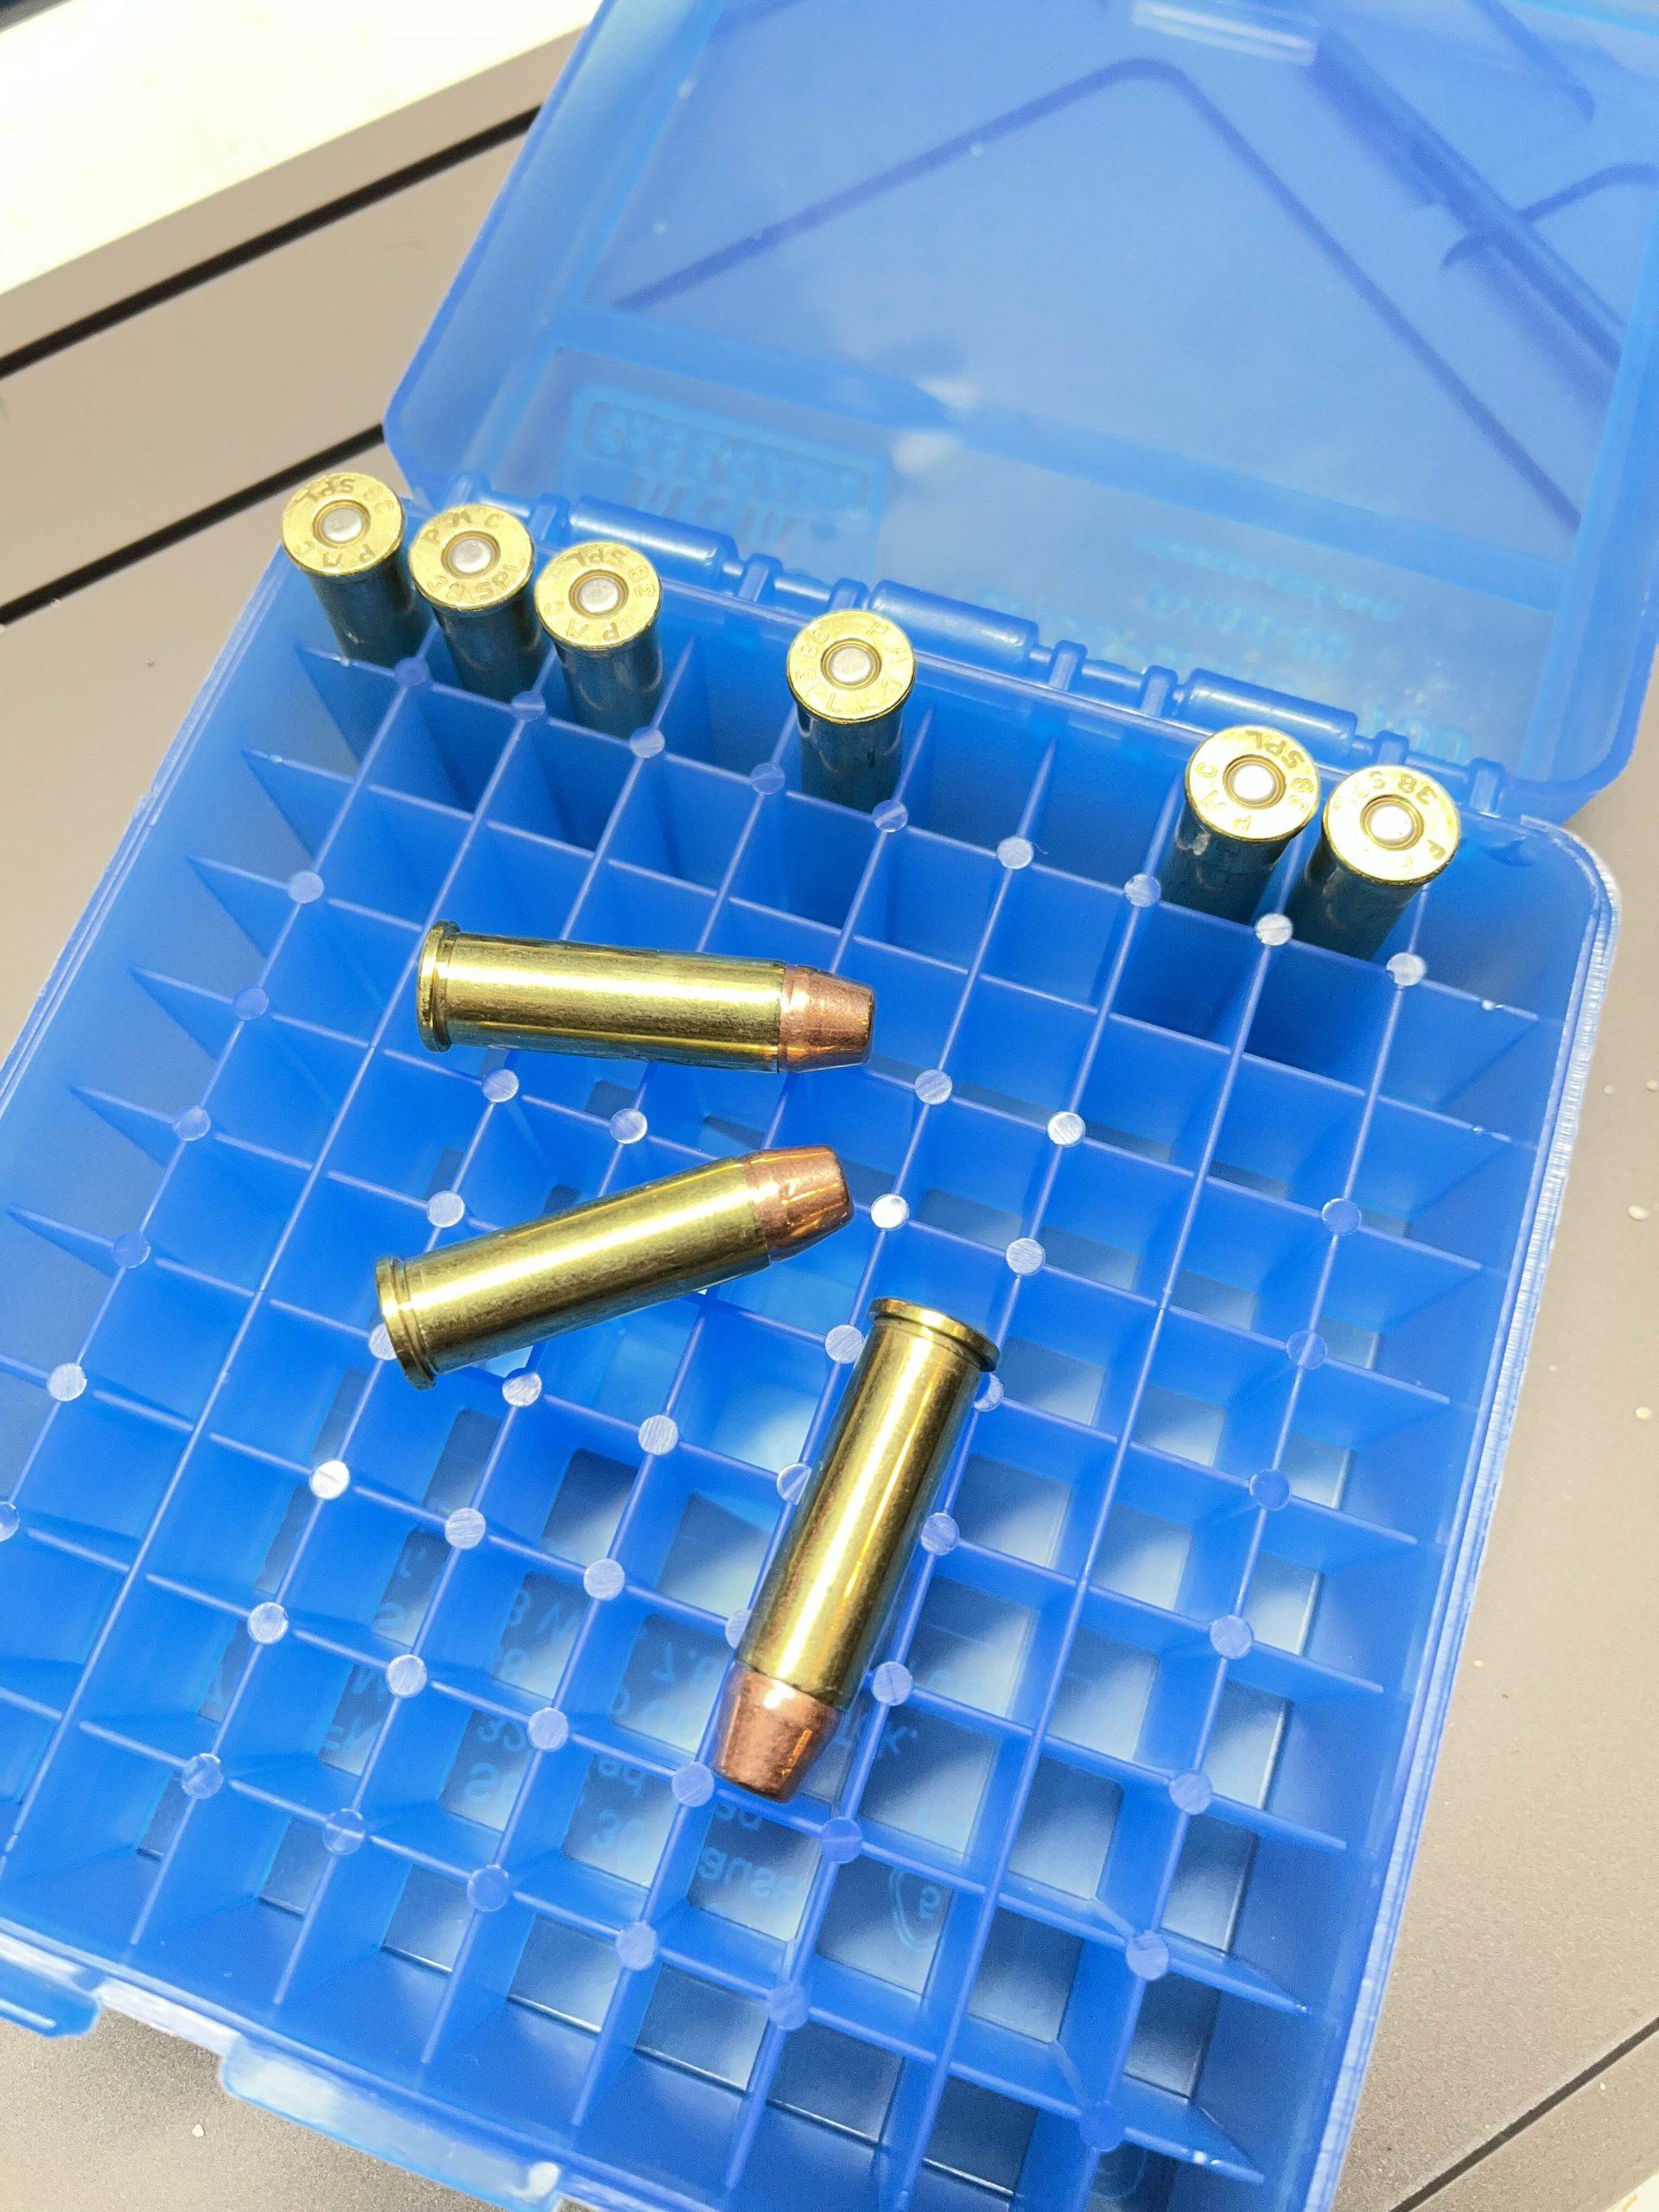
One snag I ran into with these was brass selection. It turns out that PMC brass is a bit thicker, and shoving the DEWC down into it caused a distinct bulge in the case. Because of this “hoop” around the middle of the case where the bottom of the DEWC sat, I couldn’t get the round to enter the case gauge or the gun. Starline brass didn’t have this issue, so all of my DEWC loads were in virgin Starline 38 Special brass.
Hornady 148gr LHBWC
Plated wadcutters don’t have a great reputation for accuracy, especially at distance. The classic load has always been a lead hollow-base wadcutter over a small charge of powder. The hollow base is what it sounds like. One end of the bullet is flat and used to cut the paper target. The other end has a deep hollow cavity. The idea here is that the pressure of the powder causes the base of the bullet (the “skirt”) to expand and fill the rifling of the barrel, which increases accuracy .
Whereas there’s a lower limit of velocity for the plated DEWC, the lead HBWC has an upper limit around 850 FPS. Going past that point runs a heightened risk of the pressure blowing the “skirt” off of the bullet. At best, that means worse accuracy and two chunks of lead hitting the target. At worst, it means the bullet breaks apart in the barrel and gets lodged.
For this, I went with 3.2gr of HP-38 to see where it landed me. I loaded these to a COAL of 1.165″, which puts the leading edge of the bullet right at the case mouth for a light roll crimp.
| Charge Weight | Velocity Data | Notes |
|---|---|---|
| 3.2gr HP-38 | AVG: 751.7 FPS Std Dev: 6.4 Energy: 185.7 Ft-Lb | A bit smokey, probably from the dry lube on the bullet. Shot fine. OK accuracy, but could probably dial it back to 3.1gr or 3.0gr |
In all, the Hornady LHBWC seemed fine. I want to keep experimenting with it. A box of 250 is affordable, and they have a good reputation. Getting it down to 720 FPS might give me the best performance.
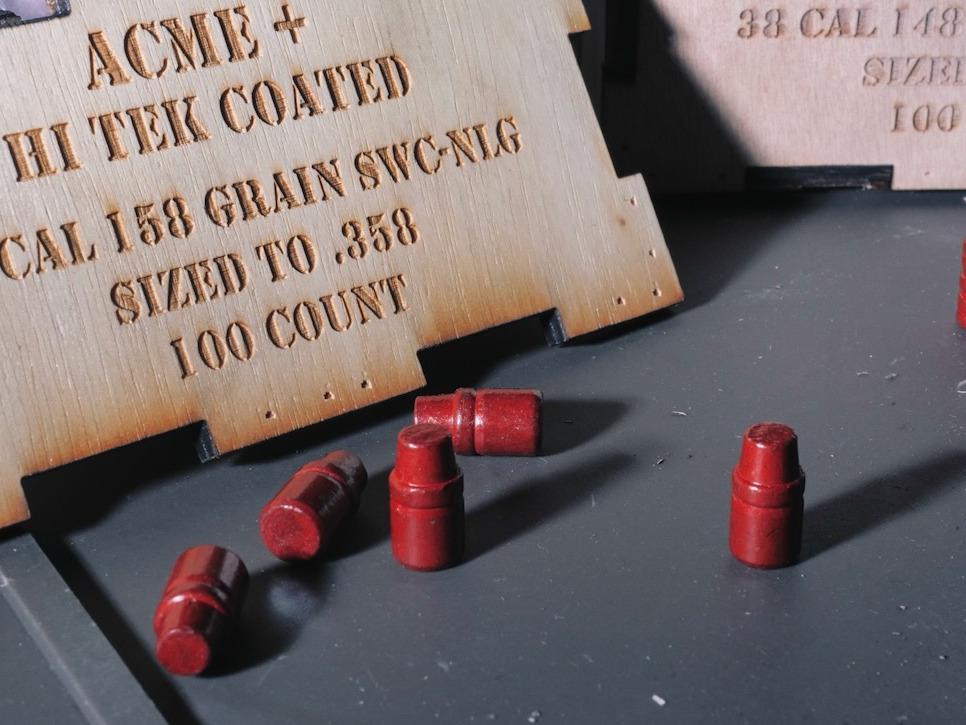
Acme 158gr LSWC
Acme Bullets are lead, with a distinctive red Hi-Tek coating to reduce fouling and eliminate the need to lube. The semi-wadcutter has the same sharp edges as full wadcutters to cut clean holes in targets, but the longer tip also makes them easier to load into the cylinder.
Once assembled, I jokingly call these the “lipstick rounds” because of the red tip.
I only loaded one charge weight for these, 3.8gr of HP-38. It was about the middle of my loading manuals. I loaded it to a COAL of 1.45″, which is putting the case mouth right at the crimp groove.
| Charge Data | Velocity Data | Notes |
|---|---|---|
| 3.8gr HP-38 | AVG: 774.2 FPS Std Dev: 5.8 Energy: 210.2 Ft-Lb | Very pleasant, good accuracy. New favorite revolver load. |
This load performed really well for me, and I think it will become a fast favorite. Pleasant to shoot, good accuracy, and plenty economical. I see turning this into my all-purpose .38 Special load for use in training and competition with the revolver. The holes in the paper were a little less clean cut, but still better than the round FMJ bullets I use in all of my semi-autos.
Thoughts on Handloading (So Far)
I’m hooked.
Being honest, I really enjoy the process of selecting components, setting up the press, and churning out batches of ammunition that I get to test and use to support my goals. I’ll probably end up spending more money on components like bullets, brass, powder, and primers this year than other “gun stuff.”
But that’s not to say that everything was smooth through the first hundred rounds. I did botch one piece PMC brass to learn that they aren’t good for wadcutters. In another instance, I lost track of my rhythm and failed to prime two cases before running them through the press. When they came out, the open flash holes at the bottom were leaking powder all over my workspace.
I also had one primer seat sideways, and also did another one upside down.
Oh, and there was one instance of me putting a primed case back into the sizer/decapper die. Thankfully nothing happened, but that could have ended up in a detonation of the primer (no powder was present).
This is why, I presume, the suggestion is to start with a single stage press rather than a progressive. You have full control over each step and have the opportunity to check your work while going in batches. That allows you to build a rhythm and cadence to how you work. As it is, for me, checking each piece of brass after a station involves a lot of fiddling and the start/stops that break the routine. I suspect that’s how I failed to prime those two cases.
That said, I take it for the learning moments they are. In all, I really enjoy the process.
Should You Consider Handloading?
So the question of the day. I see two situations where getting into handloading makes sense.
The first is if you enjoy tinkering and the general process of making ammunition and tailoring it to your use. This includes competitive shooters with high demand for performance, but also the same kind of personality who wants to wrench on cars, radios, or whatever.
The second is if you shoot sufficient quantities of relatively expensive ammunition that it makes sense. Sticking to 9mm, .45 ACP, .223, and .308 probably won’t net you much general savings unless you’re always investing in the highest quality factory match ammo. It’s not just about the cost of the press, equipment, and components- but also an investment of your time that you need to account for. On the other hand, if you’re into shooting cartridges that aren’t popular enough to benefit from huge economies of scale- and you want to shoot them a lot, then there’s some significant cost savings available in reloading.
I’m probably more in the former camp than the latter, but I’m sure I’ll see savings over time.
Thanks For Reading
Now that we’ve reached the end of this admittedly long piece, thanks for sticking with me on this little adventure. Let me know if you’d like me to publish more load data as I experiment with it. Or, hey, feel free to post your own pet loads down below.


Hand loading has lots of benefits. You can fine tune your ammo for specific weapons and purposes. Also you have more control over quality. I used to reload years ago and I’m going to start doing it again. After experiencing the ammo shortage around 2020 I discovered that you could buy components for reloading for reasonable prices (for a short period of time). I purchased several pounds of powder, primers and projectiles when I could find them at a decent price. Over the years have collected the dies and equipment needed. I had planned to load 300 BLK and now have collected a lot of brass. It should save me some $’s in the long run. Now I just need a press and I’ll be ready to roll. Find it a bit therapeutic once you get going and a good way to kill some time on a rainy day.