
A Brief History of Load Bearing Equipment
For most of military history, fighting loads rode on the hips. This location reduces fatigue over uneven terrain and takes advantage of naturally strong lower body bones and musculature. Up until 1957, this took the form of a cartridge belt (pictured above).
In the late 1950s, the Army Ordnance Board selected the M-14 as the new infantry rifle of choice. The legion of M1 Garand fans rejoiced at selecting the de-facto choice of wood and steel. However, the competing Infantry Board contested that decision for years, and ultimately lost- but not before the Air Force adopted the M-16.
Forgive me, I’m a history nerd. The important change for our purposes today was not the M-16, but the switch to rifles fed from detachable box magazines rather than clips. This meant we needed a new way to carry ammunition.
M1956 Load Carrying Equipment
Experience fighting in Korea as well as research done by Norman Hitchman during Project ALCLAD drove an effort for reducing the load on soldiers. You’ll find that this is a recurring goal in military history. In reality, it always seems more aspirational, but it’s a goal nonetheless.
To accommodate the new box magazines, the Army needed a new way to carry equipment. The M1956 Load Carrying Equipment (LCE) consisted of the following components:
- Individual equipment belt (AKA pistol belt)
- Load bearing suspenders
- First aid case/compass pouch
- Ammunition cases
- Entrenching tool carrier
- Field pack (AKA the butt pack)
- Canteen carrier
- Sleeping bag carrier straps
Everything was made of cotton canvas material. Metal keepers attached each component to the equipment belt. The system worked well, and the H-Harness design was comfortable. However, the canvas material was heavier than needed, especially when it absorbed water (which cotton tends to do). A few years later, the Army set about to improve the system.
The “Improved” M1956, AKA M1967
The Army performed two studies in the early 1960s. One focused on further lightening the load on the soldier, and the other searched for ways to conserve energy for the soldier. As you should expect, both suggested the path was towards lighter equipment. The Army dubbed this as project LINCLOE.
By 1967, LINCLOE produced a “modernized” M1956 made from nylon.
Natick Labs was experimenting such a material as early as 1961, so it was a natural fit. They succeeded in reducing the weight of rucksacks and load-bearing equipment by 50% or more.

The Army procured 20,000 sets of this experimental lightened equipment. The new gear never had an official designation, but troops on the ground called it M1967 MLCE, for modernized load carrying equipment.
It’s notable that the LINCLOE program also produced a combat vest help carry equipment higher on the chest. However, the Army decided to abandon the design in favor of continued development on the belt.
It’s not the point of today’s post, but it’s easy to imagine that it continued evolving into other programs such as the LBV-88 Load Bearing Vest or the Fighting Load Carrier.
ALICE
The LINCLOE program finalized its results in 1973, giving birth to the official designation of ALICE. Standing for All-Purpose Lightweight Individual Carry Equipment. Frag Out Magazine has a great article on the full history of ALICE and its components, but I’ll just focus on the load-bearing component.

The equipment belt was very similar to the experimental designs already produced for the 1967 MLCE. One key change was switching from the 1957-style h-harness to y-shaped suspenders. Most troops found this less comfortable, as it didn’t distribute the load nearly as well. Locating an older h-harness, or fashioning your own, became a top priority for those with the clout to do so.
ALICE officially saw service from 1973 until replacement with MOLLE by the early 2000s. There were several iterations of each piece of gear, particularly the magazine carriers.
Further Evolution
After ALICE, things began branching out.
In 1976, the Israeli Defense Forces (IDF) introduced the Ephod system. They sewed the all of the pouches directly onto the harness. This removed modularity, but increased durability and lightened the weight. The Ephod distributed the weight all around the waist and had a sustainment pouch built into the back. By all accounts, it was a very comfortable system.
The British have long used belt kits, calling it PLCE (Personal Load Carrying Equipment). Many of their units have only recently followed the US military in the use of plate carriers and chest-mounted loads. However, many troops still run PLCE systems with plate carriers sitting on top.
More recently, we saw some new h-harness designs from Eagle Industries and a variation for the Air Force known as DF-LCA (Defensor Fortis Load Carrying Equipment). Itself a variation on the Eagle Industries h-harness that appread under many names in the early 2000’s (SOFLCS, SLFCS, MLCS, etc.)

The system wasn’t all that popular, but my reading of comments from forums was that the people using weren’t setting it up correctly and just wanted something else.
By the time I was leaving active duty, most Security Forces were wearing plate carriers but had some of this gear nearby. As you’ll see in a minute, I have my own version of this harness produced by FirstSpear that has become one of my main ways of carrying equipment.
Quick Setup Tips
Before I get into my personal setups, I want to share a few universal lessons I’ve learned.
Load Carriage Height
If you choose to develop your own version of load-bearing equipment like this, be aware of carriage height.
This style of load carriage is not a battle belt. Don’t wear it low on your hips where your pants belt normally sits. That’s not an efficient location to place a load. Instead, wear load-bearing equipment along your actual waistline- much like a hiking backpack belt. Imagine it passing directly over your belly button, give or take a few inches depending on your personal anatomy.

This higher position aligns the bottom of the harness with the top of your hip bones. This is the most efficient way to transfer loads down through the legs. Also, by raising the harness to a “belly rig,” you reduce interference with shooting positions and uneven terrain.
Hazards of Load Bearing Belts
Two big hazards come to mind with load-bearing equipment like this.
First, the pouches going all around your sides and back add horizontal bulk. During a CQB type of situation, you’re probably going to get snagged on doorways and furniture. This type of equipment wasn’t designed for that kind of environment. Similarly, if you use a lot of the rear space for large sustainment pouches, it pretty much precludes comfortably riding in a vehicle seat while wearing it.
Secondly, loading down this kit means that you’re carrying everything and it’s not easy to ditch. With a more minimal battle belt and backpack combination, you can drop the backpack and just fight off the belt. It’s a much more lightweight way to go.
To counter that risk, though, if you lose the pack and everything that was in it. With a belt kit like this, you can carry 24 hours of supplies on you, no pack needed. It’s just a matter of weight. Speaking of a pack, a full LBE harness makes paring it with a ruck a little challenging. You must be judicious about placement, size, and ride height of the pack.
Setting Up Your Load Bearing Equipment
Now that we’ve gone over the history of the kit, let’s talk about how you might configure yours. I’m going to share a few examples of my own to show some variations and considerations you might want to make.

Let’s get something out of the way first. For a long time, I’ve been an advocate of combining a battle belt (or tactical belt) with a chest rig and assault pack. The reason I suggested this system is that it provides you with layers of capability that you can scale up or down over time. This also lets you acquire equipment over time without making something you owned previously obsolete.
In the hierarchy, you’ll notice that the battle belt and chest rig are lower on the pyramid and represent higher priorities than load bearing gear, which is up near the top.
With that said, I think there’s a very solid argument for a prepared citizen to jump right to a basic load bearing equipment setup even at the lower levels. Done well, it represents a complete “all-in-one” fighting kit package that you can grab and go on a minute’s notice. The only caveat is that I think the kit should still be minimalist and not interfere with other common tasks.
So let’s start there, with my take on a “Minuteman” harness configuration.

The Minuteman Harness
This harness sprung from the idea of replacing a battle belt and chest rig combination with a single piece of fighting gear that could still integrate with an assault pack and not interfere with riding in vehicles or sitting in chairs.
The goal was to carry just enough equipment to be effective in a combat situation and perform basic light infantry tasks. Of the harnesses I’m showing in this article, this is probably the most useful, and represents the starting template I suggest for all prepared marksmen to begin with.

I make adjustments here and there, moving things around or swapping pouches for different variations- but the core elements remain.
Quick Breakdown of the Template
Here are some quick general specs:
- One rifle speed reload placed front support side
- 4-6 additional magazines carried in 2-3 mag pouches
- Flat IFAK placed middle of the back
- 2x Canteen Pouches flanking the IFAK
- Admin pouch for misc items on the strong side
- TQ Pouch placed for easy access
- Optional magazine pouch, radio, dump pouch, or other utility pouch placed on the support side.
This template requires 20-22 columns of MOLLE, keeps things away from the front of the hips, and covers most things a prepared civilian would need to do for a short to mid-term activity.
The back is relatively slick. The flat IFAK doesn’t cause issues with my spine and still allows sitting in chairs or a vehicle seat. The canteen pouches off to the sides do not get in the way badly for sitting, either. I can always remove the canteens from them and they collapse down when needed.
This kit also works well with an assault pack worn high and tight to the back for additional storage capacity.
My particular harness uses a now-discontinued Blue Force Gear Beltminus V1 as the base. The Beltminus is a lightweight harness laser cut from Ultracomp laminate. Blue Force Gear made a few versions of this with the most recent being a V3 model that included additional padding and sewn in stiffeners to add rigidity.
The specific pouches pictured are as follows:
- Esstac mid-height kywi rifle speed reload
- 2 x Savotta Double Magazine Pouches that are fully boxed and use a tuck tab
- 1 x Emdom flapped magazine pouch (carries magazines or a radio)
- 2 x Arbor Arms Multi-Function Pouches (canteens or misc)
- SO Tech Viper A1 Mini IFAK
- Emdom small vertical GP pouch
- T3 Gear TQ Pouch
The actual pouch selection here is less important than the template itself. I swap between the Arbor Arms Multi-Function Pouches or older BAE Systems Eclipse canteen pouches all the time, for example. So don’t feel like you need to use the exact same harness or pouches. Experiment for yourself!
Let’s look at a few of the considerations made in this template.
Ammunition Considerations
Since the early 2000s, the trend towards open-top magazine pouches worked great for fast-paced combat in the relatively close confines of an urban environment. However, as I reviewed training reports from guys rotating through jungle schools and other light infantry work, it seemed that they were relearning lessons documented back in the 60s.
Vegetation pulls at everything and “removes” items off you that aren’t physically tied down or enclosed. Rain and mud intrusion will play hell with magazines when you’re down in the dirt.
 If you’re working with a team, and you should be, then you have more time to work your reloads from closed pouches. Sub one-second reloads aren’t the important thing here. My preference is a single speed reload available for reloading right now, and then flapped or enclosed pouches to hold and protect the rest.
My planned load starts with 5+1, meaning five magazines on the harness and one in the gun. That’s 180 rounds of 5.56 ammunition. Why that amount? Frankly, it’s arbitrary.
I tried dig back into the research, and asked several SMEs about why a modern “standard” combat load was 6+1 magazines. The general agreement is that it was arbitrary as well, an artifact of M1956, M1967, and ALICE all using two magazine cases on the belt. Since those cases held three M-16 magazines each, the default load became 6+1.
As a default, 5+1 is light and provides enough capability to do just about anything. I could further increase it by adding two more magazines into the third flapped pouch, or going up to triple magazine pouches if I don’t mind the bulk.
GP Pouches & Water Carriage
I like using GP pouches to store things like markers, land navigation tools, snacks, ear plugs, lip balm, bug spray, whatever. The little upright pouch here is sided just right for small items, including a small Rite in the Rain notebook, but not so large that I can over stuff it.

The canteen carriers double as GP pouches as well. While you’ll typically see me stuff them with Nalgene canteens, the pouches still have closures that let me secure a variety of items in them. They can each hold 4-5 magazines, smoke grenades, range supplies, binoculars, etc. You can also pick up padded inserts for them to carry and protect a set of night vision optics.
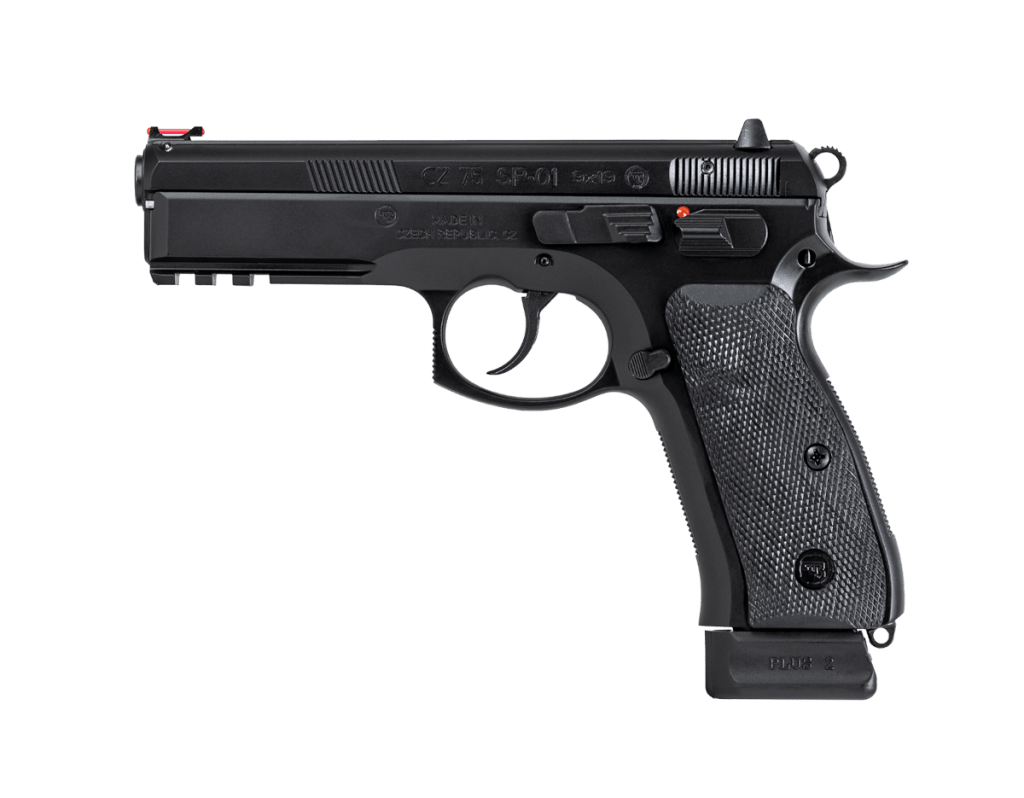
What About a Pistol?
It seems blasphemous these days that any kind of fighting kit doesn’t include a pistol. I didn’t include one here for two reasons.
First, the Beltminus V1 harness itself isn’t rigid enough to effectively support the weight of one. That’s a unique issue to this particular harness, though. If I really wanted to carry a sidearm, then it hangs off of my pants belt. This would also mean relocating, or removing, some of the pouches on the strong side to make room for the draw.
Secondly, in the grand scheme of combat a handgun is strictly a “nice to have” when you have a rifle available. A pistol is most appropriate for personal defense within confined spaces. Many combat veterans have told me that they would rather just take some more rifle magazines.
More Load Bearing Equipment Configurations
The Minuteman Rig is my go-to system for an LBE, but it’s not my only option. Over the years I’ve amassed several different belt kits, and then configured them for different jobs. Sometimes it’s just leftover parts that I slap together. Other times, it’s a bit more intentional. Let’s take a tour of the other options and styles.

The General Purpose Patrol Harness (AKA “Run & Gun” Rig)
The foundation of this harness is a long since discontinued FirstSpear 6/12 Patrolling Harness. I picked it up on closeout back in 2016. It was yet another iteration of the Eagle SFOLCS/MLCS/SLFCS harness that you can still find on the surplus market.
Of all of my kits, this one is the one that sees the most changes over time. It once served as my loaded-down “rolling heavy” rig (you’ll see it in old photos down below). Then I reconfigured it for doing Run & Gun competitions. After using it for a while, there were other limitations that I ran into and just kept modifying it.
So here’s where we’re at today.
- 1 x Tactical Tailor Magna double pistol mag pouch
- 1 x First Spear 6/9 M4 quad mag pouche
- 1 x Emdom double mag pouch
- SO Tech Viper A1 IFAK
- Blue Force Gear TQ holder (on bottom of IFAK)
- T3 Gear Platoon Sergeant GP Pouch
- T3 Gear TQ Pouch

The mag pouch configuration allows me to carry up to 6+1 5.56 magazines. Each pouch can hold a single .308 magazine as an alternative. For more of a rifle focus, I could replace the pistol magazine pouch with a speed reload pouch a la the Minuteman Harness and bring this up to 7+1. But in this example, I’ve set it up for “general purpose” which could include supporting a pistol. But where’s the holster?
You might notice that there’s a pistol in the strong side magazine pouch rather than magazines. While not ideal, this is actually a workable way to carry a sidearm in such a harness. The flap works well as a retention device, and I wouldn’t worry about the pistol falling out. However, this does complicate the draw and reholstering process.
Barring this, I could always remove the pouch and move to a dedicated holster. That’s how I did it for an actual Run & Gun.

Another noticeable change on this rig is the larger GP pouch. This one is spacious enough to hold a pair of binoculars, notebook, spare magazines, and other “leader” items.
As for water, I mount a water bladder carrier to the upper back panel when needed. No provisions for hard sided water carriers here.
This particular harness has a lot of thick bungee cords holding the two side panels and back panel together. That makes it very tight fitting against the body. It’s very comfortable, and it moves very well with me during “athletic” activities.
The harness does not work well with a ruck due to the thickness of the shoulder straps.

The Rifleman Harness
This is the “gucci gear” system. Consisting of a complete Velocity Systems jungle harness. I did not buy it all at the same time, but instead picked it up piecemeal over a couple of years. The intent of this harness is mid to long range patrol stuff in either training courses or emergencies.
The original configuration of this one was quite a bit heavier, but I’ve slimmed it down a lot since I first discussed it. Why? Because I simply did not need all of the carrying capacity that I loaded it down with and would rather streamline it. As you’ll see, though, it was only partially successful.
At present, it consists of:
- 4 x Velocity Systems Jungle 5.56 pouches
- 2 x Velocity Systems Jungle Canteen pouches
- 2 x Velocity Systems Jungle GP pouches
- 1 x T3 Gear TQ pouch
And that’s it.
With four triple mag pouches, this harness allows for 12+1 magazine carriage. I use one of the magazine pouches to hold an IFAK insert, which brings nominal capacity down to 9+1. That’s still plenty.
On top of that, each 5.56 mag pouch can alternatively hold 2 x 308 PMAGs for a heavier platform. That brings capacity to 6+1 308 (or 8+1 if I remove the IFAK contents). So aside from patrolling, this also serves well for supporting a DMR.
I dropped the single large buttpack in favor of the two large GP pouches to better segment items. It also better forms a “pouch shelf” across the back, which helps it integrate well with a ruck.
Here’s the thing…as nice as this harness is, I simply don’t use it. I’m the wrong audience for it. It’s not doing anything particularly better than the previous two other than give me more cargo space. The boxed triple mag pouches are more difficult to get into and reload from, and all of the large pouches overall generate a lot of horizontal bulk. It’s comfortable, for sure, but the whole thing is simply more than I need.
Another complicating factor is that the way Velocity Systems designed it means that the shoulder harness itself attaches to the pouches rather than the belt. So even if I wanted to slim down the pouches and use lower profile stuff like the others, I couldn’t easily do it. I need a whole new belt that lets me attach the harness to the belt directly rather than the pouches. Again, that’s a problem specific to this particular harness.
As it is, the Rifleman Harness is mostly for “show” with me unless I need to max out 308 PMAG capacity.

The Junkyard Rig
This harness came about simply because I had the spare parts on hand. After I lost a bunch of weight in 2023, my old padded MOLLE battle belt didn’t fit on its own anymore. That drove me to assemble a whole new battle belt system.
I couldn’t just have a perfectly good padded MOLLE belt in my gear box unused. Since I had a set of Tactical Tailor Fight Light suspenders, I put it to use and rigged up yet another LBE harness. This particular one somewhat inspired by the British PLCE kit.
- 2 x MVT GP pouches
- 2 x Tactical Tailor Universal Mag Pouches
- 1 x BAE Systems Eclipse double mag Pouch
- 4 x Tactical Tailor Canteen/Utility Pouches
- 1 x ATS Slimline IFAK
The TT universal pouches hold three 5.56 magazines each, and the BAE systems holds two. That brings capacity up to 8+1 for 5.56, though I actually envision using the BAE pouch more for miscellaneous items like a radio.

Two of the utility pouches hold canteens, while the other two can hold whatever things I feel like stuffing in there like snacks, a poncho, binoculars, whatever. It’s a very flexible system. One of the benefits of this particular configuration is that it makes a wide and flat shelf along the back for an assault pack or ruck to rest on.
If I wanted to, this rig would work very well with a pistol my swapping the support side small GP pouch with mag pouches and sticking a holster on the strong side.
I think of it more as a “hand out” system in an emergency and I need to gear someone else up. That said, it’s probably a bit “too much” for that- especially with an untrained shooter.
In that case, it would probably be better to make it more minimalist, something like you’ll see down below with the “Minimalist Kit,” which used the same suspenders and mag pouches.
[DEFUNCT] “Rolling Heavy” Rig
This was my first go at fully kitting out the First Spear harness I now dub the General Purpose Patrol Rig.


Very nice. You must be part of the Rubbermaid Brigade (my nice way of saying gear queer) and it takes one to know one. I just started paring down all of this stuff as I figured out my evolutions and boy did it take up some space.
I must admit that your three articles caused me to peruse the ebay for some quality pouches that some other sucker was going to exodus from their basement.
The rationale behind your rigs is great. As always, the resources and additional reading is wonderful. In short, great article as always. I feel like I’m reading a better organized and better written AND more informed article that I would have written.
Good stuff.
Hey Mark!
Yeah, I’m a bit of a gear nerd. I’ve collected a lot of stuff over the years, and some of it was so nice that I didn’t think it was right to not finish it out, lol. I think I’ve also bought into the concept of team so much that I felt a little compelled to have enough gear that I could outfit 4-5 people with weapons and equipment in a pinch.
I usually find good deals at during manufacturer clearance sales or at places like Entrygear, which liquidate stock from contract overruns.
Once again, same here. Two rigs for different environs with a spare for someone. Might I suggest a cache, smartly put aside for the rainiest of days?
Just as expensive though is the ancillary gear. Multi tools, compasses, blades and quality knick knacks here and there…man, it’s a lot of money. Comms!
But when you look at the force multiplier, just during small emergencies alone, the value is tremendous.
No argument from me there. The ancillary gear is a definite nice to have. Comms would be a huge multiplier if I could provide for it. But, priorities being what they are, I think I’m satisfied at this point with the equipment collection and am pivoting more towards further growth of ancillary skills (like comms and rudimentary SIGINT), fieldcraft, and logistics.
A cache is a great idea, but I’d have to spend a lot of time trying to think of or find a place in my area that would be suitable.
I like this series too much. I’m still more of a belt-and-backpack guy but while I was reading this I starting trying to justify putting some sort of LBE system together…
Also, I’d never heard of “EntryGear” before. I’m already looking at things I shouldn’t be considering.
LOL, funny how that works, right? I know you just did Desert Brutality (looking forward to that writeup, BTW). I’m curious to hear how your gear worked out for it. If it’s working well for you now, I wouldn’t be in a rush to build up something new. I hate to say it, but one of the big reasons I have so much “stuff” is that I was a little bored of not getting range time, and I was too impatient to save up money for things that were more important. A lot of my gear purchases were impulsive but relatively inexpensive. Spread that over years and…well, you know…
Entrygear is a good place. I’m also a big fan of OPtactical and SKDtac, but they are generally more well known.
I’ve settled on a two-piece approach. A pistol belt with wide fanny pack, canteen w/cup & stove, IFAK, sheath knife, with extra water, a day’s simple rations, stove fuel, and a few other odds and ends in the fanny pack. Currently pistol-less. A J-frame 5-shot .38 lives in the pants pocket. If I thought it necessary, a 1911 holster & mag pouch can be added to the belt. Then, either original GI clip belt & suspenders w/extra canteen & bayonet for the M1, or, a current GI molle vest with AR mag pouches and extra canteen. I also have a fisherman’s short vest with many pockets that carry useful small items.
Rationale being, when I don’t need to have a rifle in hand, I can take off the rifle rig when I put down the rifle, and keep the pistol belt on with some basic supplies & sidearm, along with the fishing vest.
For a big ruck, I’d have to take off the pistol belt and attach it to the ruck, so I could use the ruck hip belt. The M1 clip belt & vest equipment are arranged to fit OK under the ruck.
At my age though I think I’ll just stay home and guard the front porch.
Hey Pete! I’m glad you could stop by. I remember you telling me about that setup before, and it seems eminently practical. You might be the only guy I know traipsing around the mountains with an M1.
Yeah well I have a severe emotional attachment to them….
I think I would replace “traipse” with “trudge” though.
I do have a “36 hour” light daypack too, for staying out overnight in warmer weather (space blanket tarp + woobie, MRE’s, water filter, etc.). At 60 with a bum knee, my days of (and need for) patrolling in the steep stuff are over. Can still move slow and steady if I have to though.
Interesting article as usual. Wow! Over my head …. again. LOL I should just send you my credit card information and let you set me up. LOL
Hey Ken! I don’t mean to be going over anyone’s head, lol. What is it you’re looking to do?
I really enjoy your well thought out approach to setting up your gear and how it’s going to work for you! It would be interesting to hear what your anticipated mission parameters would be (reconnaissance, observation, long rang patrols, vehicle mounted ops, etc) and how your kit will help you fill those specific needs..
Your first rig, the “hot and muggy” seems to make the most sense for an all around setup that can integrate with an assault pack or a larger patrol pack all the while giving you some freedom to add a micro chest rig up front if needed.
I really like what you’re doing here!
P.S. I too have an abundance of pouches and platforms and enjoy trying to improve upon a given system. You’re definitely not alone in having that “problem”.
When it comes to mission parameters, I’m much more of a generalist. I don’t plan for kicking down doors or anything like that. I build up my kits primarily with dismounted short to medium range foot patrols in mind.
To be honest, the most “practical” of my kits is the battle belt and chest rig combination, and that would likely be my go-to for 90% of situations that could arise. I think something like these belt kits become more niche players for specific weather conditions or weapons systems like a 308.
Well I am too old for door kicking and LRRP activity, so like you Matt my go to rigs (One for 6.8SPC / 45 ACP and one identical rig for 5.56 and 9mm) are a combination of a minimalist Kore molle belt for side arm, a couple of extra handgun mags, a couple extra AR mags, a canteen and a TQ. Combined with typically modified TAPS chest rig holding 6 AR mags, 4 pistol mags, a blade, an IFAK, flashlight, a small GP pouch, radio and a couple more TQs.
These rigs are primarily oriented to deter and defend against small casual groups of do-bads. They are by design light on water, nourishment and comfort items. I also have a heavy rig but if I need to drag that out my problems are probably not going to be solved by the gear I am carrying.
Hey Matt, wonderful article! I just picked up the Beltminus myself for just about the same deal in the same color you did; I plan on furthering my kit as you did and I really do appreciate the addition and consideration of the assault pack to your gear. It helps with it’s versatility and seems like it could actually be used to move somewhere, someplace, with reasonable kit and reasonable chances.
My main question is regarding that shock-cord that you’ve used on your kit. Where exactly did you get it from and what kind of techniques did you use to fasten it/tie it off? It seems like an incredibly handy addition. Excellent job again.
Hi Dave, I’m glad you enjoyed it and thanks for commenting!
I used a simple overhand knot on the ends of the cord as well as a polymer cord lock (the kind you pinch to allow adjustment).
I had the shock cord in hand from doing adjustments in one of my bolt gun stock pads. I originally picked it up from the Mil Spec Monkey store, I think.
https://milspecmonkey.com/store/hardware-diy/347-shock-cord.html
You can get the cord locks as well from him.
I got the idea from the Brits and their belt kits. If I was doing it from scratch, I would have used a single run of 1/4 inch cord rather than the 1/8 that I had and ran twice.
I never saw it advertised anywhere, but the Velocity Systems Jungle Pouches I Used for this have tie off points on each side of the pouch as well as a channel under the buckle that is perfect for running bungee like this.
Well done sir! I run a small sewing shop making nylon gear. People like you who actually use the gear are gold mines for design and ideas!
Holler if you ever want to talk gear!
Kody from Sewjourngear.com
Hey Kody, thanks for reading and commenting! I’ve always been interested in the guys who have the know-how and equipment to make their own gear. You’ve got a nice setup over there, it seems!
Thank you for the most informative article. It is nice to see a thought out and logically written piece that isn’t an ad for specific equipment companies.
I now have ideas on moving forward with a well thought out rig setup. Thank you again!
I wish I didn’t find this article so late. I would have been able to find out about that First Spear harness sooner and get my hands on it before it was discontinued. Shame that it was, the straps look way more comfortable than their new Joker rig. Only place I could find it is on their site and nobody is hocking theirs on ebay.
It really is too bad that they stopped producing it, as it’s a fine piece of gear. If you’re in the market still, the best alternative I can find right now is the Mayflower Jungle Kit, though it’s not padded at the shoulders.
Good article, been thinking of putting one together.
These kinds of rigs have been my go-to for years now, at least since I first started collecting surplus in high school. One of my first rigs was an M1956, although more durable materials are available now I think there’s something to be said for cotton canvas in terms of comfort. It seems to absorb bounce a bit better than nylon and isn’t as abrasive, but I’ll agree that it’s not a worthwhile tradeoff for durability. Seeing as it’s set up to be “period correct” I’ve never used it in the field as that would require changing things around in order to be practical.
I’ve been running a combination of ALICE and MOLLE gear, the information here was great for figuring out how to arrange so newer pieces. It would be nice to see more industry support for those of us running shotguns as our primaries, there’s a lot of interesting tips and tricks for carrying shotshells but I don’t see too many of them being shared.
Just curious. What is your typical butt pack load?
Belt kits continue to intrigue me, enough to make me want to put one together someday. But, for now, I agree with you that the best general purpose kit is a battle belt/chest rig combo, depending on environment of course. My belt and chest rig are nearly the same weight, but the belt edges out as being just a little heavier. Both are around 16lbs a piece all said and done. The chest rig carries the meat and potatoes of the rig, rifle ammo, water, and comms. The belt takes care of the rest (handgun, extra rifle ammo, pistol ammo, IFAK, smoke?, food, knife). I think of the chest rig as the, “If I had to run out and fight right this minute close to my dwelling place.” And the whole kit is for taking care of business if things are more prolonged or planned ahead.
I would like some belt kit if I was going on a longer range patrol and it was going to be very hot. Though, even then I’m not sure since my chest rig is so beloved to me haha. I love reloading from the front.
Best overview I have seen. MOLLE APM number 13, PEO Soldier. US Army
I am a 60 year old vet. Went into Army in 1980 and got out in 1992. We used LBE entire time.
I ruck 2x per week: 5 miles w/ 55lb dead load.
I use a “Chinese” H-Harness with a pistol belt and a Blackhawk pad for the belt.
I have a 2d kit that I use when I am on volunteer missions with local Search and Rescue. Different loadout.
The basic premise of a “fighting load” and a “sustainment load” is still valid. I understand that in the past 20 years, the Army has moved away from a “field army” / maneuver model to a day-mission model.
Weight is everything, as is comfort. Drop leg holsters just don’t work after a week in the field, when you are walking everywhere. Body armor is great, but it adds weight that increases fatigue and reduces mobility. It’s a trade-off.
Great article.
Can someone give me a diagram of how the sleeping bag straps is attached to either the US ARMY buttpack or the back of the H harness of 1956 LBE system ?
Hey Danny, this is the best we could find for you on the topic: https://youtu.be/7meFM_MbLIg?t=200
This answers many questions I had, but there is one question that I cant seem to get an answer on: 4-point or 6-point harness? It seems most harnesses sold today are 4 point, but historically, militaries around the world used 6 point harnesses. Surely they tested 4 point harnesses but everyone still chose 6 point. Thoughts as to why one would be chosen over the other? Is this a case of lost knowledge like the fully enclosed magazine pouches? Or is it a case of “we learned and refined over the years”?
Hey Don, that’s a good question. I can’t actually find any specific answers around it either. I know the British use a 6 point system with the PLCE as an example. On the domestic side, the Velocity Systems Jungle Rig utilizes a 6 point design as well, but that’s not officially adopted. My only guess is that it’s probably arbitrary, and most designs have stuck with what the M1956 used (4 point). As to why the M1956 had a 4 point, I have no idea. It could be as simple as, “we didn’t know what we didn’t know” and then it just stuck.
Great article! I am currently trying to transform my battle belt into a LBE rig (hadn’t set up the belt with more than a mag pouch, dump pouch and pistol poches anyways) this will help me a lot on what to consider and how to set mine up. I will be going more towards your heavy rig with a heavy emphasis on carrying 762 magazines (there is only one 762 and its x51).
Hey Matt – nice ‘revisit’ to a popular theme. I don’t have anything to add (for once) – thought you upgraded the topic very well. We all have our ‘favs’ as far as a bestie go-to rig goes. I do have to put my ‘two cents’ in for the much overlooked LBV-88E and the FLC – too much heavy load capability and adaptability there not to mention. Curios about optic on the ‘Junkyard Rig’ pic rifle – particularly because I have that fixed DD rear sight you’ve mounted and are co-witnessing with?
That optic is an Aimpoint M5. Great little dot, but very $$$ these days.
Thanks. I have a Japanese brand of red dot that’s been sitting on a Ruger Blackhawk Hunter in 44 mag for years that seems quite rugged and still reasonably affordable. I’ll seek a co-witness mount for AR15 and go from there. Think I’ll be looking at compact prism optics soon anyway.
I would be keenly interested to know your thoughts on the Jay Jay’s PLCE or the new Crossfire DZ Rig. I find the British style PLCE the superior LBE for all things a civilian rifleman may have to attempt.
Hi Mike, I don’t have personal experience with Jay Jay’s, but I know it is highly regarded. I was also very close to picking up the Diz rig when it was announced, but didn’t have the available budget.
In all, though, I suspect you are right that for a full scale LBE system designed to carry a soldier’s load (a la my Velocity Systems harness), either Jay Jay’s or the Diz Rig would be superior. However, that comes with a big caveat from my part that unless we’re thinking in terms of full on light infantry work rather than community defense, such an LBE might be too much to deal with in bost cost, weight, and capacity.
Perhaps I missed it, but what is the rig that is pictured in the tiger-stripe pattern??
Hi Ted, I believe you’re referring to the DF-LCS system I mentioned at about that point in the article. It’s in the old US Air Force ABU pattern. The base unit is the Garrett Container Systems H-Harness, so if you search for that you’re likely to find it all over. As I searched for GCS LBE right now, I found the harness in multicam for $99 on Ebay.
Great write up! Have you tried out the Nixieworks Light Fighter Rig?
It’s a great modern take on LBE made in the USA.
Nice webbing considerations! I’m personally a fan of the German webbing system, the KTS 95. It is very cheap to get and modular enough for my needs. I personally have the buttpack, a 4+1 load +1 in the buttpack ideally, an e tool, canteen pouch with an aluminum canteen and cup in it and an e tool pouch with e tool. My IFAK I carry in my leg pocket and I use rubber bands for the Tournequit on the rig itself. In the buttpack I carry an additional water container (Nalgene canteen or thermos flask), weapon cleaning kit, water purification, an ESBIT stove and a booboo kit to prevent infection from cuts. Ontop of it I have a poncho for rain protection or shelter building in case I can’t reach my backpack. I want to try out the double mag pouches available for it to get up to a 8+1 system, but I don’t know if that is necessary for what I need to do. You can also exchange the e tool with the map pouch for leadership. In case I need a pistol, I just use my leg holster from Heim with additional mag pouches attached. I don’t mind the long reload of a pistol, since I’d most likely be dead if I need to reload that anyway. I still need to get a bayonet and see where that attaches best. There’s also external padding available, but I find it OK without, but I will try that out as… Read more »
Condor Slim Battle Belt
Condor H-harness
The Slim battle belt in medium is 3 blocks of 7x Molle
+ 1x exposed belt portion on the back left and right
23 rows, but leave 1x empty on the front left & right.
—-
The Old USMC IFAK/200 Round Pouch is my go-to
Holds about 3.5L each – the GI waist pack is about 7L.
2L canteen, poncho w/e it fits a fuck ton.
Left Side – 1st empty
1x Double Mag or whatever your speed reload (2)
1x USMC IFAK (3)
Last Slot + Left Belt
Back Side
2x USMC IFAK Pouch (6)
Last slot of the right side + right belt portion
Right Side – 1 empty
2x USMC Ifak Pouch (6)
H-Harness can hold a full 3L Bladder, e-tool, etc
Also molle on shoulder strap – radio, compass, maybe mag?
—-
Total Cost:
Like $50 for the Battle Belt + Harness
Like $50 for the 5x IFAK Pouches (200 cubic inches each)
A pistol could go on the thigh, SWAT-style.
It’s possible, but generally I’m not a fan of drop leg configurations.