
I’ve spent a lot of time waxing poetic about the importance of consistency. Even more, applying that consistency to a core set of fundamental skills. The goal, as always, is raising the *floor* of your performance over time, as well as your ceiling for times of specialization. The absolute best way to do this is with dry practice. Note that I’m saying dry practice and not just dry fire. They are related, but practice is a much more comprehensive idea beyond pulling the trigger.
Quality dry practice should be a component of every marksman’s training regime, not just high level competitors. This is not news to you. I’ve been saying it for years. But, what I haven’t done is document what a good consistent dry practice routine looks like and how to execute it over time.
The good news is that when you’re managing your baseline, time spent in practice doesn’t need to be excessive. 15 minutes a few times per week is all you need.
Bottom Line Up Front: The 15-Minute Schedule
As usual, this is a long article. So let’s get the summary up front and then get into details. The best dry practice routine is not a universal checklist, or a random selection made in the moment. Think of it as a progression of skills from one to the next. The first order of business is the basic elements, getting quality repetitions in, and then working up to the target skill that you’re working on.
For a basic 15-minute template, try this:
- 2 minutes: Safety ritual and setup
- 3 minutes: Basic refresher of presentation, sight picture, and trigger
- 8 minutes: Focused training progression on a targeted skill area
- 2 minutes: Document session notes, and prepare the weapon for either storage or carry
Repeat this process 4-6 days per week over several weeks, then confirm your progress with a short live-fire benchmark drill where appropriate. Of course, I suggest one of the Everyday Marksman standard courses of fire for a benchmark, but you’re welcome to use whatever validation tool you want.
What Dry Practice is For
Unlike many discussions on the topic, we’re going deep. The first thing to clear up is that I’m talking about something far more involved than an evening spent pressing the trigger in your living room without any ammunition loaded. This has some value, at least for a while, but the real thing is a different ball game.
If all you’re doing is trigger presses, you’re leaving a lot of gains on the table. We want our dry practice to train transferrable skills to our live shooting. This practice should include metrics and standards for every repetition, just as we would see doing it live. Then, the final validation is actually shooting a set course of fire, with consistent constraints, and tracking our progress over time.
What Dry Practice Does Well
A dry practice routine can do a lot, but it is not the all-things training method. There are certain things that it’s actually good for:
- Draw and presentation
- Developing a consistent sight picture
- Reloads and manipulations
- Target transitions and visual discipline
- Position entries, exits, and footwork
- Thinking through decision points and stage plans
What Dry Practice Does Not Do Well
This is where dry practice falls short, and you’ll have to rely more on live fire training. If you’re typically limited by how much time you have at the range, then most of your time should go to these skills. Once you’re done with your skill validation, that is.
- Managing recoil and recovery
- Tracking your sight picture under recoil over multiple shots
- Stomping out your flinch response
The Dry Practice Routine Progression Model
Let’s talk about focus areas. Dry practice is for everyone, but there are skills and build on one another. A relative beginner should spend more time on the early focus areas, while skilled shooters will probably spend more time on the later ones since the early stuff has become automatic.

Focus Area 1: Safe Handling and Administration
This is the foundation: loading, unloading, making the weapon ready, confirming its status, and making it safe for storage.
The goal of this area is building a consistent administrative sequence to the point that you automatically execute it without fail. Your risk of making safety-related mistakes later on becomes much lower when you’ve built a habit out of following the exact same sequence of steps to verify the condition of a weapon every time you pick it up.
Think in terms of the beginning and end of a duty shift, range session, or a day carrying your weapon.
- Environment check: Ensure that you’re about to perform this process in a safe environment with a quality backstop should something go wrong. If doing dry practice, segregate your live ammunition from the practice environment. Do not have live ammo or loaded magazines nearby.
- Start condition: Retrieve the firearm, keep it pointed in a safe direction, verify there is no magazine present, open the action and inspect the chamber (Note: I do this every time I pick up any firearm. Even one that I just performed the procedure on two minutes before. If I set a weapon down and leave it alone, I’ve trained myself to believe that it could have loaded itself in the two minutes I was looking away from it).
- Making ready: Load the weapon, chamber a round, verify and put the weapon in a safe condition (i.e. safety on, hammer decocked, etc.) If you’re using dummy rounds, then treat them as if they were live ammunition.
- End condition: Remove the ammunition feeding device, open the action and inspect the chamber to confirm it is clear, close the action, make the weapon safe (i.e. lower the hammer, release the striker, etc.) and store it safely.
This process is not about speed, it’s about removing ambiguity about the condition of the weapon and how you handle it.
There isn’t any live fire validation for this focus area. It’s just something that you must do automatically. You need to perform this sequence the same way every time, without improvising, rushing, or skipping any steps.
While working on this first focus area, consider the skills I just mentioned:
- Safely operating the action
- Inspecting the chamber
- Loading and unloading
- Manipulating the safety and hammer
- Holstering and unholstering process without any time constraints
- Staging and storage
For most of us, once we’ve mastered this focus area to the point that it’s automatic, then we probably aren’t going to spend much time on it again in the future. The one exception is when we buy a new weapon with a different way of doing things. For example, despite doing what I do for many years, I still spent a good amount of time in this focus area when I bought a revolver because I was simply less familiar with it. The same was true of the time I spent with an AK, since it was administratively different than an AR.

Focus Area 2: Basic Marksmanship
Once you’ve developed consistent safe gun handling, the next focus area is all about stable shooting positions and a consistent sight picture throughout the firing process. Honestly, most people need to spend a lot more time here even if it’s “boring.”
For pistol, a dry practice routine should include:
- Freestyle two-handed presentation
- Strong-hand-only presentation
- Weak-hand-only presentation
- Developing a consistent and correct sight picture
- Trigger press without disturbing the sights
- Follow-through after the trigger press
For rifle, ignore the strong-hand and weak-hand guidance and instead focus on slung and unslung employment of the basic positions ensuring that we develop a solid natural point of aim with each:
- Standing position (and it should get the most time)
- Sitting
- Kneeling
- Prone
The goal of our dry practice routine in Focus Area 2 is more than “hold the gun up” or “click at the wall.” It’s building the position, settling into natural point of aim, confirming the correct sight picture, pressing the trigger without disturbing the sights, and holding the trigger back until we’re ready to repeat.
Dry practice at this level is entirely par-time based, and utilizing generous time limits.
For validation, we have two standard courses of fire. The precision pistol course is a 30-round test of your pistol marksmanship fundamentals. Progress on this course over time correlates directly with progress on your basic marksmanship. Similarly, the basic rifle marksmanship course does the same thing for rifle shooting.
Generally, I’d say only pick one weapon platform to focus on at a time. You can rotate every few months between pistol and rifle, if you want. To that, I’d add that proficiency with pistol carries over to rifle quite well but the opposite is not necessarily true.

Focus Area 3: Weapon Manipulation on the Clock
This area builds on the foundational safety skills of Focus Area 1. Whereas the basics did not apply any time pressure or stress to the administrative process, Area 3 does. This focus area is about manipulating the firearm efficiently without degrading safety or awareness.
Things that we include here happen in emergency scenarios:
- Drawing and presenting on the clock
- Manipulating the safety during position changes and movement
- Reloads
- Clearing malfunctions
- Building and breaking positions while maintaining safe control of the firearm
There does not need to be a standalone live-fire validation here. These skills show up later in practical shooting standards, competitions, training courses, and scenario-based shooting.
Dry practice here can also involve a timer, and almost always in par timer mode. That does not mean there is permission to get sloppy. Remember, the goal is refining consistent movement patterns so that you execute it the same way every time, only faster.
Focus Area 4: Balancing Speed and Accuracy
This is where most people think dry practice starts. Really, it should come after you’ve gained sufficient skill in the earlier areas.
The focus is getting to an acceptable sight picture quickly, and then confirming that speed does not outrun your ability to control the weapon. Metrics we look for include:
- Time to first shot from the holster or low ready
- Presentation from concealment
- Quickly building or transitioning positions
Par times are useful here, too. You don’t even have to pull the trigger, if you don’t want to. If you’ve done the earlier work, you’ll have already built a solid trigger pull without disturbing the sights. Just getting to a good enough presentation and mentally noting “bang” is often enough. That said, you can also start racing the clock if your timer is capable of picking up on a dry fire impulse.
What dry fire cannot help you do is manage recoil, so your live fire training time should start focusing a lot more on things like controlled pairs. In my view, dry practice gets you to the first acceptable sight picture, live fire is where you work on keeping the gun stable during multiple shots.
For validation, we have the practical pistol course of fire and the defensive rifle course.

Focus Area 5: Dynamic Shooting
The final area is about target transitions, visual skills, and complicated improvised positions on the clock.
Examples of skills you can do in dry practice:
- Multiple targets spread over varying distances
- Entering and exiting positions/barricades
- Improvised support
- Ladders, posts, vehicles, range props, and other awkward structures
As before, the trigger press itself is probably not the main skill at this level. The focus skills are about making your eyes move to the target first, bringing the sights in alignment, and having a stable enough position to make the shot.
For validation, the one remaining standard course of fire is the action pistol course because it involves both multiple targets and added time pressure. Beyond that, you’re into the realm of general action shooting competitions, so your relative performance on these stages is your ultimate validation of progress.
Executing a Dry Practice Session
Again, we want consistency. Performing a dry practice routine the same way every time builds a mental model of what it’s supposed to look and feel like, which means your brain will alert if you if it feels like you’re starting to drift from it. But you need to build the habit.
Step 1: Safety Ritual and Setup (2 minutes)
If you refer back to our bottom line up front, we want our session to be done in 15 minutes. The first two minutes are just about setting us up for a safe session.
Have a designated place to perform your practice. Most of us live in places where no direction is truly “safe” except the ground, so do your best to be aware of what’s behind whatever wall you’re pointing at and avoid something that could be catastrophic.
Secondly, I prefer to practice in an area separate from my ammunition and gear storage. Typically, that’s my garage.
Third, before beginning, perform your administrative “make ready” process with your firearm to verify it is in a safe condition to begin. That should also include any ammunition loaders you might be using. Make sure that all of the magazines on your belt are actually empty (or using dummy rounds), and you didn’t accidentally grab one with live ammunition.
A lot of guys actually use designated training magazines for this purpose and mark them with blue tape, a blue floorplate, or something so they know never to put live ammo in them.
Step 2: Basic Refresher of Sight Picture and Trigger (3 minutes)
The next three minutes go to Focus Area 2 stuff. Slow, deliberate, and consistent execution of marksmanship fundamentals. Establish a mindset of “clean reps only.”
What’s a clean rep? That depends on you. For me, it’s when I know I presented a correct and clean sight picture, with natural point of aim, and the trigger press did not impact that picture.
Step 3: Main Focus Area (8 minutes)
Now we pivot to whatever the main skill we wanted to focus on is. If it’s basic marksmanship (Area 2), then we introduce the par time and buckle down on just a few skills like strong-hand-only for pistol or kneeling for rifle. Don’t dilute the session with too much variety.
I like to use par time ladders, where I set a par time and progressively decrease that time every few [clean] repetitions until I’m at the edge of not being able to do it anymore. This kind of stress is what helps build the neural pathways in your brain that actively enhance your performance over time.
But do not outrun your abilities. If you reinforce sloppy technique for the sake of the clock, you’ll just see sloppy results the next time you validate things.
Step 4: Document Session Notes and Prepare the Weapon
Once you’re done with a session, you need to log it. Similar to a gym log, you need a way to track how your training is going over time. Write down the date, time, the focus area, and whatever drill you were working on. Document any relevant data about your performance.
| Date | Drill | Metric | Performance | Notes |
|---|---|---|---|---|
| 7/16/2026 | Draw to first shot with CZ 75D PCR | Par time ladder, 5 draws per | Started at 2.0 sec, ended at 1.1 sec where I only had two good draws | Fumbled the hand position on the draw as I sped up |
| 7/18/2026 | Draw to first shot with CZ 75D PCR | Par time ladder, 5 draws per | Started at 1.8 sec, ended at 0.8 sec | Improved grip from last time, good session |
Once you’ve documented your session, it’s time to deal with the weapon. For me, that usually means doing the administrative process for ensuring the weapon is unloaded and safe for storage. However, I know some people who do their dry fire routines before starting their duty day or going out with their carry weapon. In these cases, they actually need to do the process of verifying their weapon is clear of any dummy ammunition and is correctly loaded with duty ammo.
I know of at least one person who admitted that they accidentally took their LE duty weapon out with them on patrol still loaded with Snap Caps because they rushed this final step of readying their weapon.
This goes back to consistency of your process. Do it the same way every time, no skipping steps.
Validation
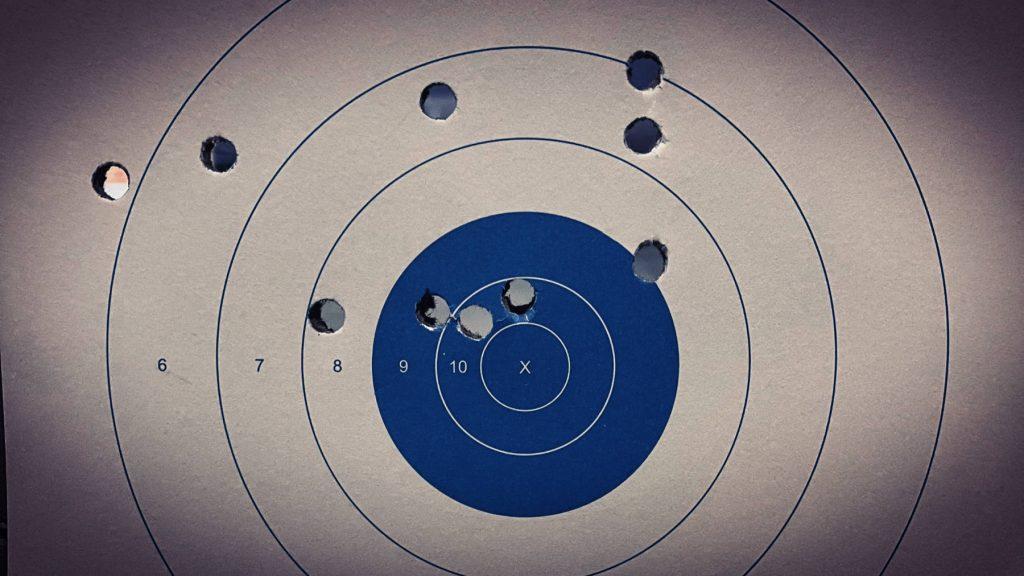
Once you’ve been consistent with your dry fire routine several days per week over a few weeks, you’re in a good position to go validate your progress. Go to the range and start out with your selected benchmark, whether it’s one of mine or one you’ve developed for yourself.
If you improve your performance, then things are working and you should keep doing what you’re doing.
If your performance doesn’t improve, or it gets worse, then you know that something is amiss with your dry fire routine. Perhaps you’re cheating yourself in practice by skipping steps or not focusing. Maybe you’re practicing the wrong skill, and you need to evaluate whether the dry practice skill(s) you’re working on actually have anything to do with the validation test.
In any case, you need a good consistent validation method that has clear scoring, fixed constraints, and consistent execution.
Additional References
If you’re interested in learning from the proven experts on this topic, then I have two suggestions for you. The first is Refinement and Repetition by Steve Anderson. This book came as a suggestion to me years ago when I interviewed Mike Green of Green Ops Tactical.
Second, Dryfire Reloaded by Ben Stoeger is a seminal classic. Ben and Joel Park also released another dry practice manual targeted at pistol dot shooters in late 2025: Baseline Dryfire: A Guide to Red Dot Mastery.



I always enjoy the course. After years of pistol competition, I moved to shotgunning; skeet and sporting Clays. Now, at age 82, I am returning to the handgun. This involves range and dry fire (inside my workshop). I confess to being a K-frame S&W guy and sticking with my faithful Browning HP for semi-auto work. Eyesight issues are key for folks my age. Could you address training for people in my age group. I am considering changing to the 20g shotgun as my main home defense weapon. What say you?
Cortes Pauls