Not long ago, we discussed a hierarchy for training zones. The idea was breaking down a prioritized bracket of distances to train for. Those ranges broke down to 0-50 yards, 50-200 yards, 200-300 yards, 300-600 yards, and 600+ yards. Along with that, we established that our standard training target is a 10″ circle. The target is always 10″ regardless of the distance, so you would naturally expect to hit the target faster at closer distances and take slightly longer at further distances.

As part of that post, I also established that the official training target for The Everyday Marksman going forward is the NRA TQ-4. Today, I’m sharing the first of several drills and tests I’m working on that utilize this target.
First, let’s discuss the drill itself and then I’ll talk through some of the details. Of note, there are two versions of this drill. They’re performed exactly the same. The only difference is in the scoring.
Marksman Drill #1-A
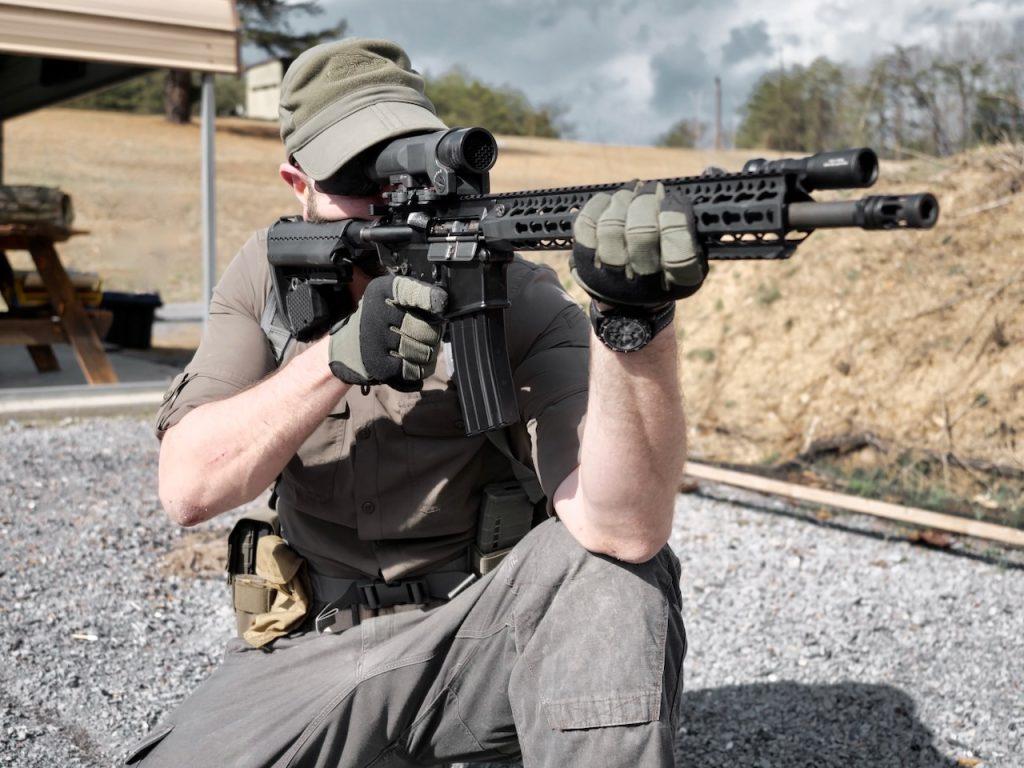
You can perform this drill at any distance and with any weapon platform. I’m keeping this intentionally agnostic for reasons that I’ll touch on in a bit.

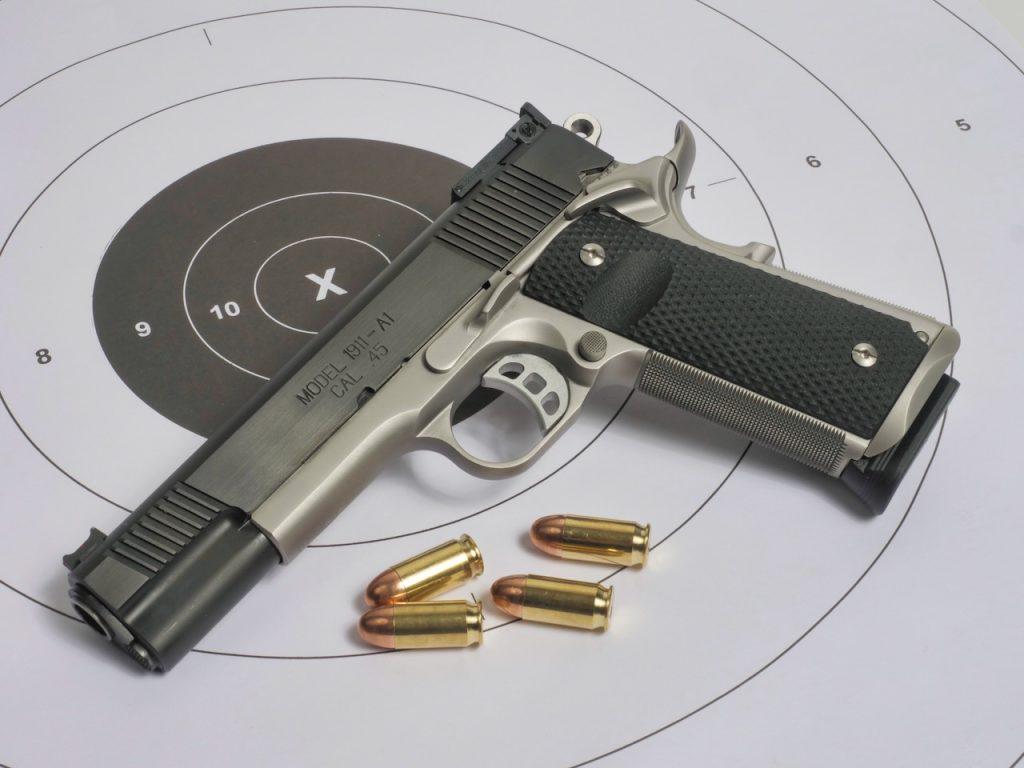
To perform this drill, you require 20 rounds of ammunition, two magazines, a shot timer, and an NRA TQ-4 target. If that target is not available, any 10″ circle will do. A 10″ paper plate, steel gong, cardboard cutout, or whatever.
This drill consists of four strings of fire, five shots each. Ideally, you should shoot this drill cold without any prior warmup.
String One – Single Shots
Begin in the standing position. If using a pistol, it should be holstered and loaded with five shots. If using a long gun, it should be in the low ready position, loaded with five shots, and the safety activated.
On start, fire a single shot at the target. Record the time for the shot. Ensure the weapon is back in ready status (i.e. decocked and holstered, or back on safe for a rifle) before the next shot, and then repeat four more times. Be sure to record your time for each shot.
String Two – Rapid Fire
Begin in the standing position. If using a pistol, it should be holstered and loaded with five shots. With a long gun, it shall be in the low ready position, loaded with five shots, and the safety activated.
On start, fire five shots at the target as quickly as quickly as you can while remaining on target. After the final shot, safe the weapon and record your time for all five shots.
String Three – Transitions
Begin in the standing position. If using a pistol, it shall be holstered and loaded with five shots. With a long gun, it shall be in the low ready position, loaded with five shots, and the safety activated.
For Handguns
On start, draw and fire two shots at the target with strong hand only. After the second shot, switch hands to the support side hand only and fire the remaining three shots. After the final shot, safe the weapon record your time.
For Long Guns
On start, raise the weapon and fire two shots from the strong side shoulder. Place the weapon on safe (if possible), switch to the support side shoulder, deactivate the safety, and fire the remaining three shots. After the final shot, record your time.
String Four – Reload
Begin in the standing position. If using a pistol, it shall be holstered and loaded with two shots. With a long gun, it shall be in the low ready position, loaded with two shots, and the safety activated. A spare magazine loaded with three shots shall be available in a reasonable location.
On start, fire two shots- taking the weapon to slide or bolt lock (if available). Reload the weapon with the spare magazine and fire the remaining three shots. After the final shot, safe the weapon and record your time.
Scoring Drill 1-A
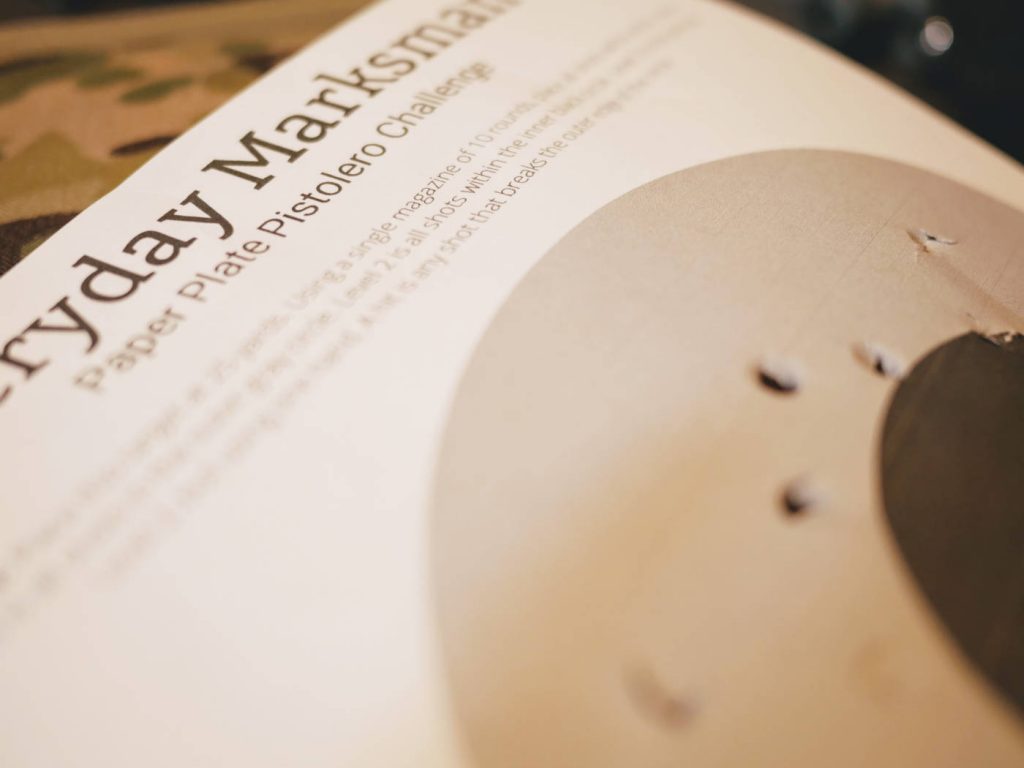
Drill 1-A is only concerned with hits and time. The minimum standard is all 20 shots within the 10″ circle, regardless of time. If you’re using the TQ-4 target, that means all shots are within the 6-ring or better. Preferably the black 7-ring or better. If any hit fell outside of the 10″ mark, then the whole drill is an automatic failure.
If you completed the minimum standard, then your score is the total time for all four strings. You might also want to track your time for each individual string for later diagnostic use later. Be sure to document your final score, the distance you completed the drill, and any additional details about your weapon system and gear setup (i.e. duty holster, AIWB carry, etc.).
Marksman Drill #1-B
Drill 1-B requires you to use the TQ-4 target since we now include the scoring rings. The execution of the four strings is otherwise identical. After each string, or each individual shot for the first string, document your time and the point values for your shots.
Again, the minimum standard is all shots within the 6-ring or better. Once that’s been verified, add up the point value for all 20 shots. There is a maximum of 200 points available. Add up all the times for each string to arrive at a total time. Divide your point total by the time total it took to complete all four strings.
As an example, let’s say you completed Drill 1-B at 25 yards. You kept al 20 shots within the 10″ circle and had a point total of 180. Your total time to completion adds up to 35 seconds. That means your final score would be 5.14 (that’s 180 divided by 35).
Document your final score along with the distance to target, weapon platform, and gear configuration. Again, you might also want to keep track of your individual string scores for use in training later.
Now For the Discussion
First off, I need to make a few acknowledgements. The base of Drill #1 starts with the Bill Wilson 5×5 drill, which came to my attention via my friend Justin at Swift Silent Deadly. That drill is specifically for handguns with a set distance of 10 yards. It’s used an IDPA qualifier. I also borrowed the hand transition from the FBI handgun qualification. In both cases, I modified the rules to allow for long guns as well as handguns.
The purpose of Drill #1 is building an emphasis on speed while being “accurate enough.” This isn’t a high power competition, so the goal isn’t to get the highest number of points from the scoring rings, but rather to get the fastest time while keeping your hits in an acceptable area. As we established in the training zones article, our acceptable area is a 10″ circle with 8″ being preferable. The first priority is not missing any hits. The second priority is doing it quickly.
With Drill #1-B, you earn more points with speed than you do with more accuracy. Think of it this way: let’s say you placed all 20 hits in the 6-ring, the lowest possible passing “score” of 120 points. You did it in 25 seconds total. 120 divided by 25 yields a final score of 4.8.
Now let’s assume you run it again, sacrificing a little bit of time in order to get more accurate hits. Your point score adds up to 188, but you took 50 seconds total. 188 divided by 50 yields a final score of 3.76. Despite being more accurate, you earned a lower final score due to being slower.
Of course, the best answer is improving both speed and accuracy. You can do both with training, but the primary goal of Drill #1 is promoting speed.
Why These Strings?
Each string targets a different marksmanship skill.
String number one, for example, focuses on the snap shot. String two is about managing recoil and keeping a solid sight picture. The third string introduces non-dominant shooting skills, as you might have to do from behind a barrier. The final string involves weapon manipulation and managing your supporting equipment.
Position and Scoring Standards
One observation you might have is that I didn’t mention anything about shooting position to use. The only stipulation of the drill is that you start from the standing ready position and do not miss any hits. My intention is that you assume the most appropriate position that you need to do in order to both keep to the minimum accuracy standard and maintain speed. I expect that that further away the target is for your skill level, the more stable of a position you’ll have to use. Naturally, taking the more stable position leads to taking more time.
As you progress in skills, you might find that you adopt quicker positions for some distances than you used to. Perhaps you used to go to sitting or prone for 100 yards, but now leverage the faster kneeling position- or even standing if your ability is up for it. In fact, at longer distances you’ll probably find that your time is better by using a more stable position since you’ll have less wobble to deal with.
Other than the minimum standard of keeping all shots within the 10″ circle, I’m not prescribing any particular time standard. We’re not here to issue classifications for anything. The goal of the drill is providing you with a current performance level, and then encouraging you to improve it over time. This drill is infinitely progressible. Much like lifting weights, you know where you are at today with any given movement and then work to improve that movement by spending time and effort on it.
Also, frankly, there are too many variables in this drill to accurately dictate a par time. The mix of distance and weapon platform make it a very individual thing.
Training For Success
As my friend John Simpson likes to say, you don’t train for the test by performing the test over and over. Drill #1 is meant as a quick diagnostic to evaluate where you are at with any given weapon platform and distance. Even though you have a final overall score, you also have the individual string scores. That helps you evaluate any particular weak points.
So how to you improve upon it? The trick treating each string as it’s own objective. Break down the requirements for success into individual components and work on those.
Let’s take the snap shot string as an example (string #1). For a handgun, we can break this down into a few distinct pieces: the draw, acquiring a sight picture, and breaking the shot. Speed comes from learning how to quickly and consistently perform each component. One of the best way’s I’ve come across to train this is by using the par time function of a shot timer. Set the par timer, then practice with it. Don’t outrun the timer, but work the tempo so that you break the shot exactly on the beep. Progressively decrease the par time in small increments, like 0.2 seconds. Master the new tempo, then reduce the time again. Sooner or later, you’ll be moving very quickly.
Similarly, for the rapid fire portions like the second shot string, your goal is developing a steady cadence that lets you maintain a sight picture while controlling recoil. As with the previous example, start with a par timer that allows for a generous cadence. As you master the time, progressively decrease the par time. With work, you learn how to track the sights and manage the recoil impulse.
Reduced Size Targets
At some point, I’m sure someone will want to train for a longer distance while not having access to a longer range. I’m in this point frequently, as I only have ready access to ranges up to 50 yards without traveling for more than an hour. In this case, I suggest narrowing the acceptable target zone for closer distances. The 9-ring is 2″, making it a close enough substitute for the entire 10″ circle (or better yet, the 8″ circle) at 25 yards to simulate shooting at 100 yards. The 8-ring is 6″, which makes it an okay-ish substitute at 50 yards.
These are only for training purposes, do not use these scaled estimates to do formal scoring.
Another of the issues this introduces is knowing your holds. My intention with Drill #1 is that you use your same rifle/pistol and standard zero at all distances. So if you normally set your rifle for a point blank zero at 50 yards, then you should use that same zero when shooting the drill at 15, 25, 100, and 200 yards. This absolutely means that you’re going to have to learn to manage your offsets at those distances in order to keep your hits within the circle.
By using the “scaled” scoring zone at 25 yards to simulate a 100 yard target, you’re not reinforcing the same motor control for managing your holds. It’s just something to be aware of.
Wrapping Up
I hope you enjoy this drill. I plan to use it as the opening portion of any training sessions going forward. It’s quick, easy to execute, and flexible enough to work with any weapon platform at any distance. Let me know if you have any thoughts or feedback down in the comments, of course.


I like the thinking outside the box training ideas, well done